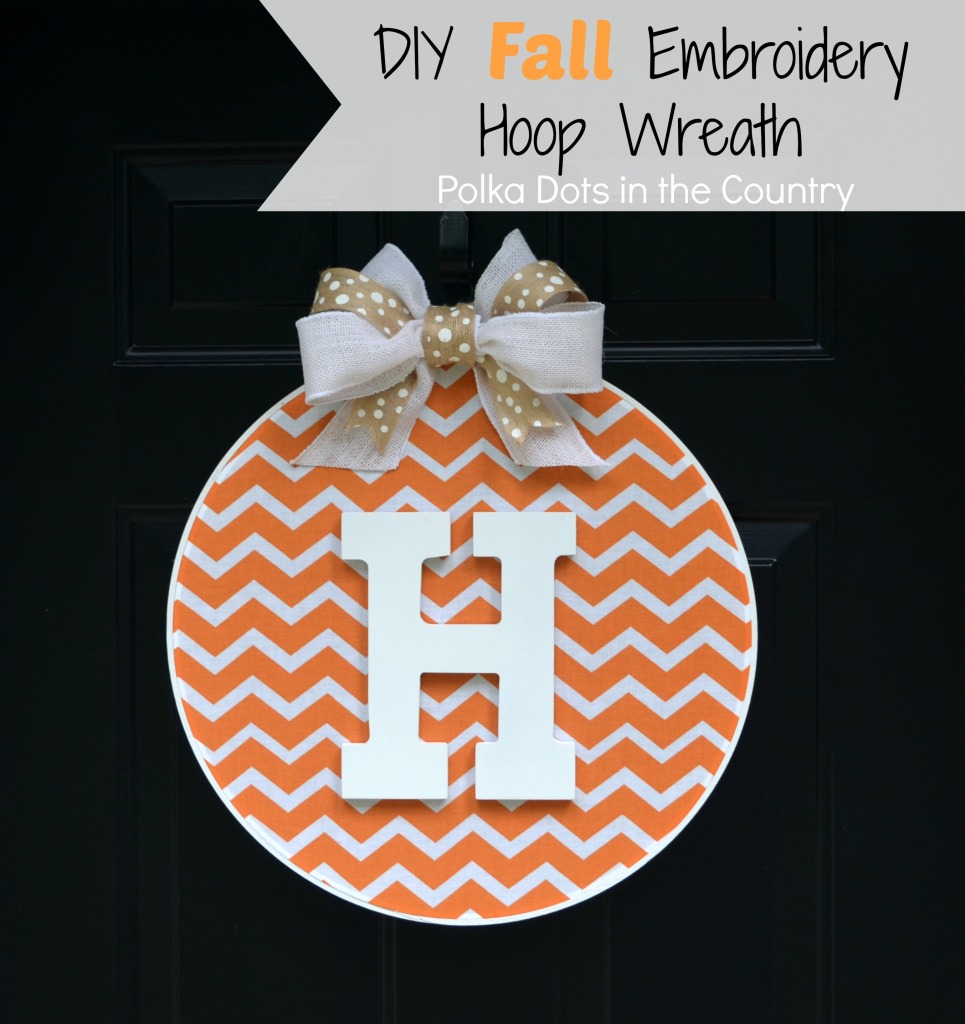
Fall Embroidery Hoop Wreath
Hey y’all!
I’m Maggie and I blog over at Polka Dots in the Country. I am so excited to be taking over today for Paige while she’s in Rwanda!
Before we get started I wanted to take a second to thank Paige for reaching out to me to guest post while she’s away. Paige is one of the first blog friends I’ve made since starting my blog last October. Between our #oilyskinissues, love of crafting and of guys named Corey (mine spells Corey with an “ey” while her Cory is just a “y”) I’ve really gotten to know her over the past months. Not trying to be creepy, but I think we could be friends in real life.
Anywho… here’s the story behind my blog.
Polka Dots in the Country started last October to share the progress Corey and I make on our first home together. Corey bought our house in March of last year and ever since I’ve become even more obsessed with home decor blogs and Pinterest. (Didn’t know that was possible, but it is.) While most of my blog focuses on home decor, you’ll also see some Friday Favorites, random happenings, and pictures of our adorable pit bull Molly and our newest addition, Ms. Kay.
So, in honor of Paige’s love of Clemson I thought I’d share my Fall embroidery hoop wreath with y’all today. Because it’s orange.
Let’s get started!
Here’s what you’ll need:
- embroidery hoop
- fabric
- monogram
- spray paint
- hot glue gun/glue sticks
- burlap ribbon
- twisties
- floral wire
I used Lowe’s Valspar white satin spray paint to paint the wood embroidery hoop.
Heat up the glue gun so it’ll be ready after you secure the fabric to the hoop.
Once the hoop was dry I loosened the screw up top to remove the inner circle of the hoop.
Place the fabric over the outer hoop with the back of the fabric facing toward you.
Then put the smaller hoop inside the out hoop and tighten the screw.
Flip it over and before tightening completely make sure to pull the fabric taught so there are no wrinkles in your wreath.
Cut the excess fabric.
I used two pieces of floral wire to make a hoop to hang the wreath.
For the bow I used whatever I had on hand, so that included this white wired burlap ribbon and some leftover polka dot burlap.
Hot glue your monogram and bow and you’re done!
I hope y’all enjoyed and thanks again to Paige for having me guest post today!
——————
I absolutely adore Maggie and all her awesome DIY projects! She is such an inspiration! Make sure to head on over to Polka Dots in the Country and follow along on social media so you don’t miss any of her projects! By the way, I feel the same way Maggie- we would totally be BFF’s :)


6 Comments
Rebecca Jo
Now that is just too cute!!!!
Maggie@ Polka Dots in the Country
Thank you!
Lisa loves john
Absolutely love this – especially the size!! Super cute!
Maggie@ Polka Dots in the Country
Thank you!
Rose - www.muchloveroseblog.tumblr.com
hi paig-
THis is so cute – how did you make the bow….it so pretty
thank you so much
have a great day
rose
Maggie@ Polka Dots in the Country
Thank you! I basically just made loops, secured them with a twisty, wrapped a piece of burlap around the ends of all the hoops to connect it and hot glued the polka dot burlap to the white burlap. I pretty much made it up as I went and it’s not a very official way to make a bow, but it worked! I need to do a tutorial..