
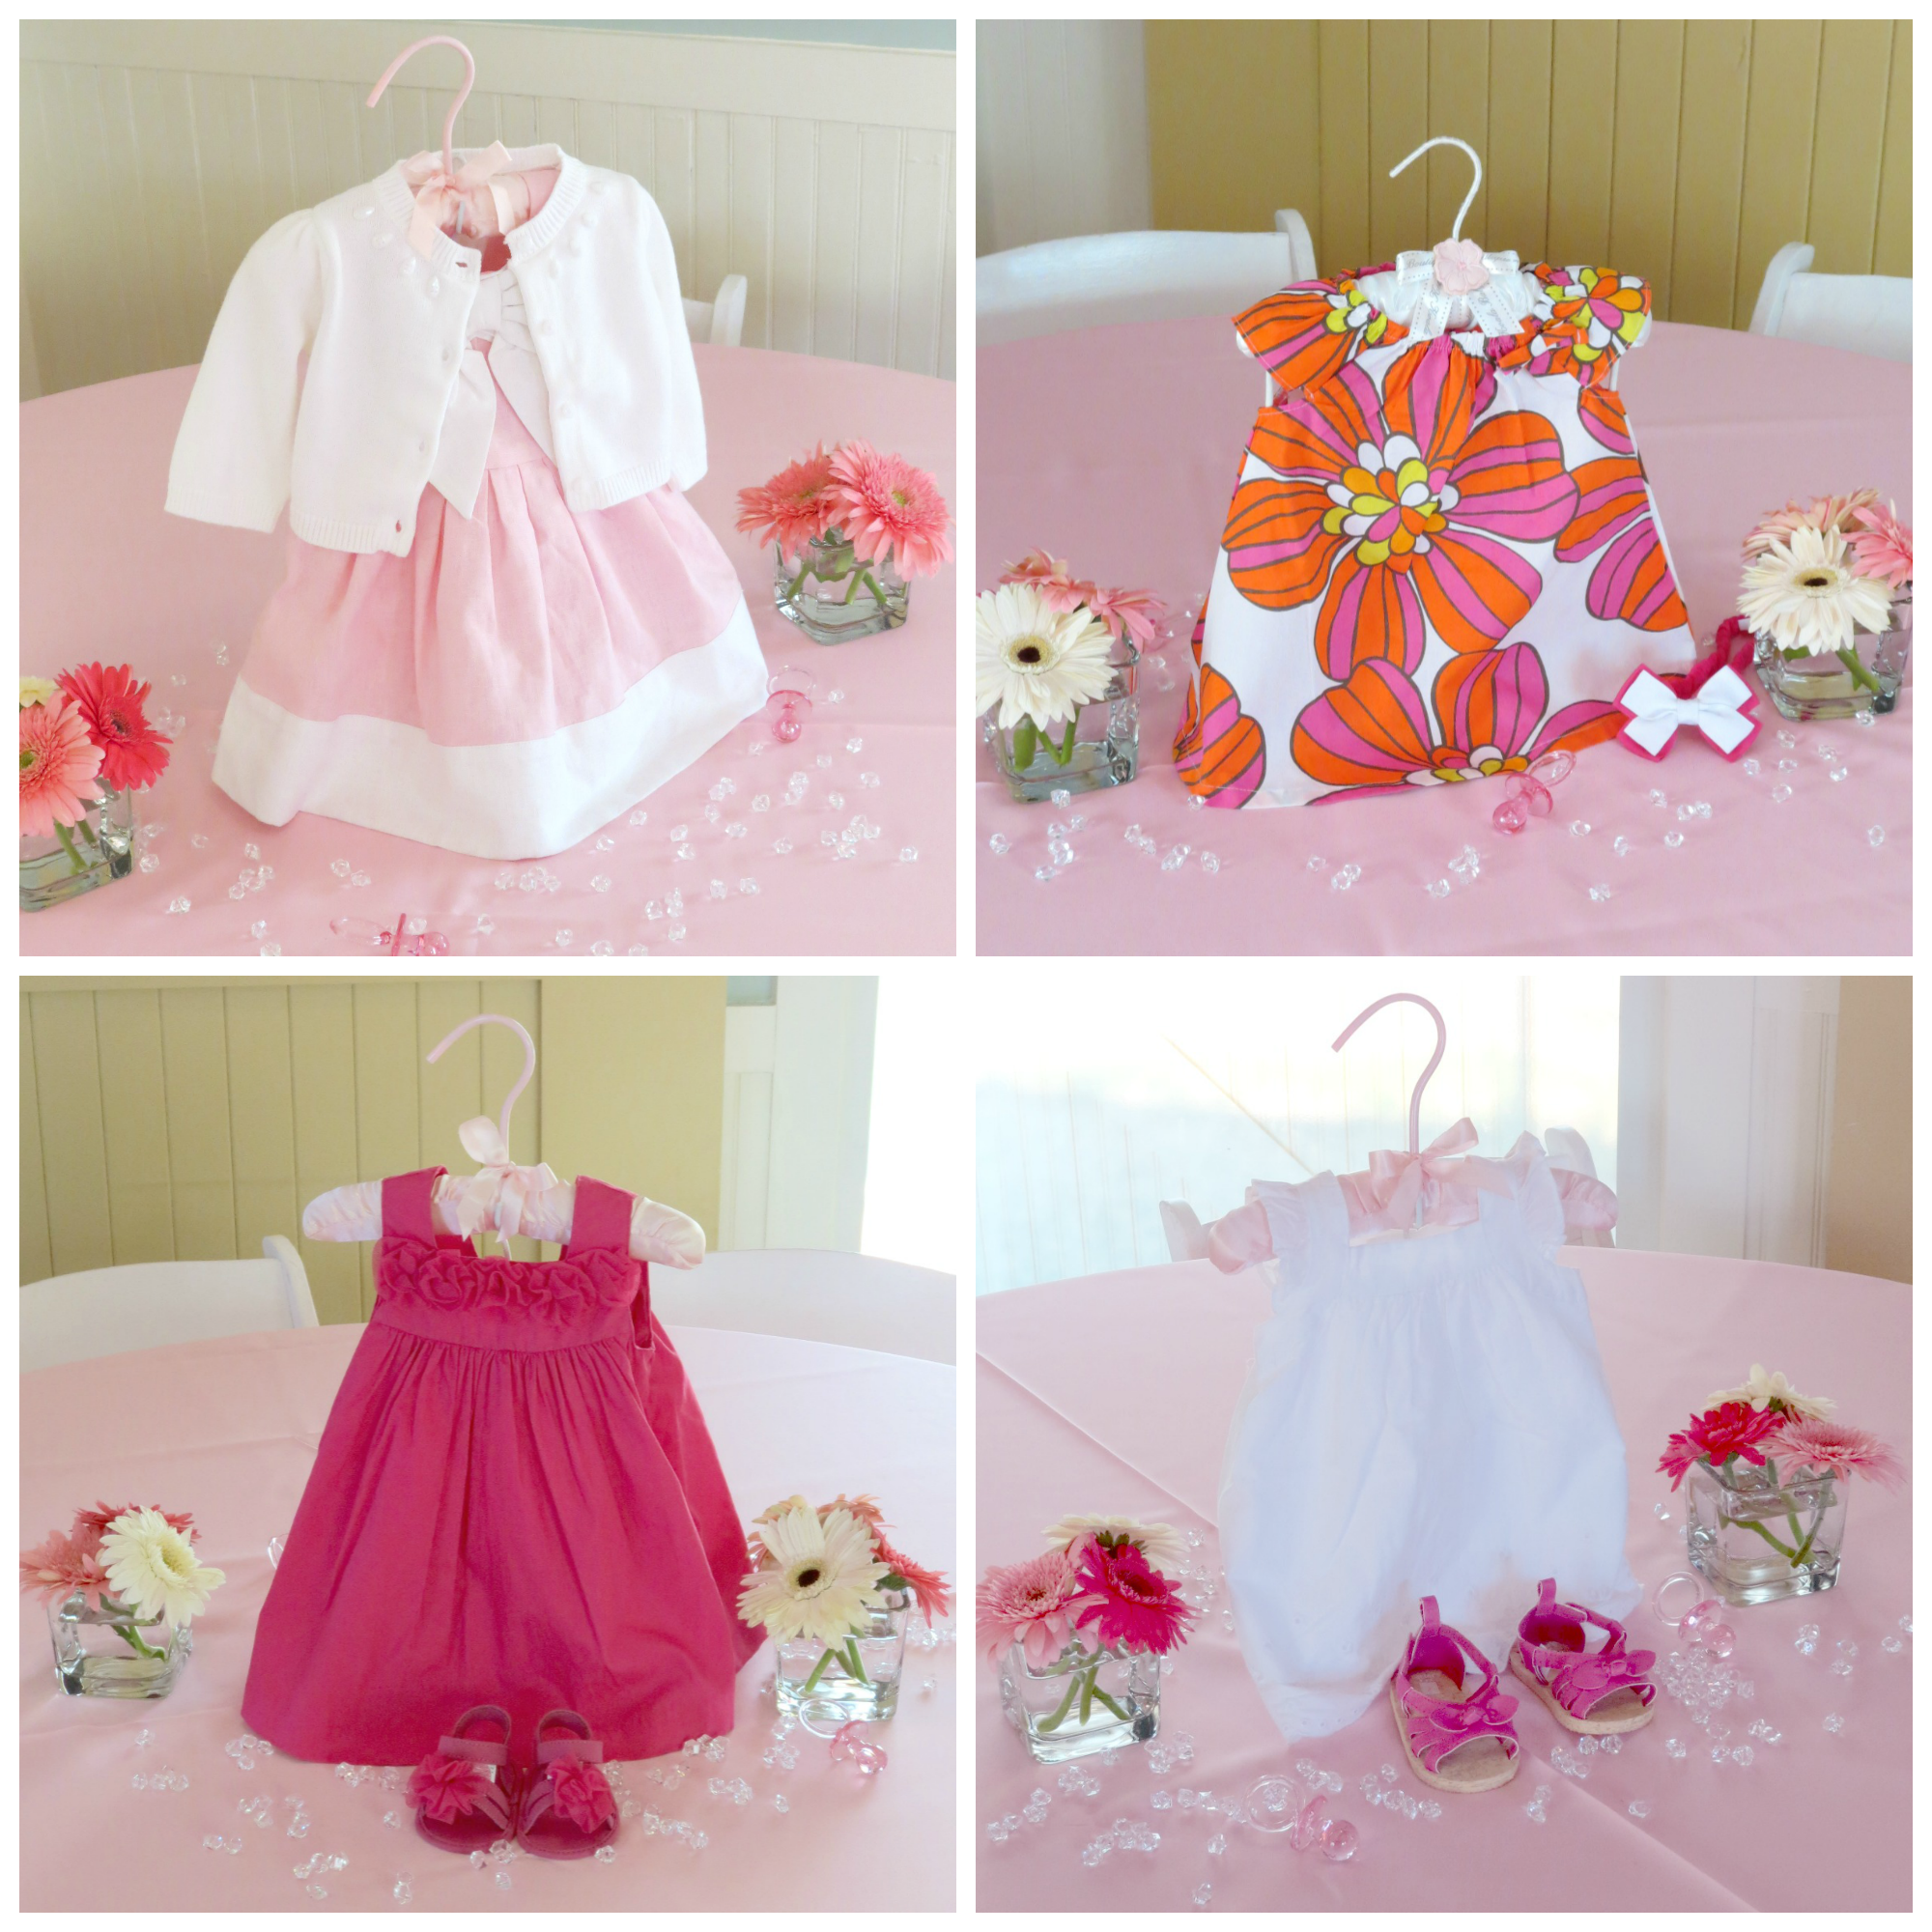
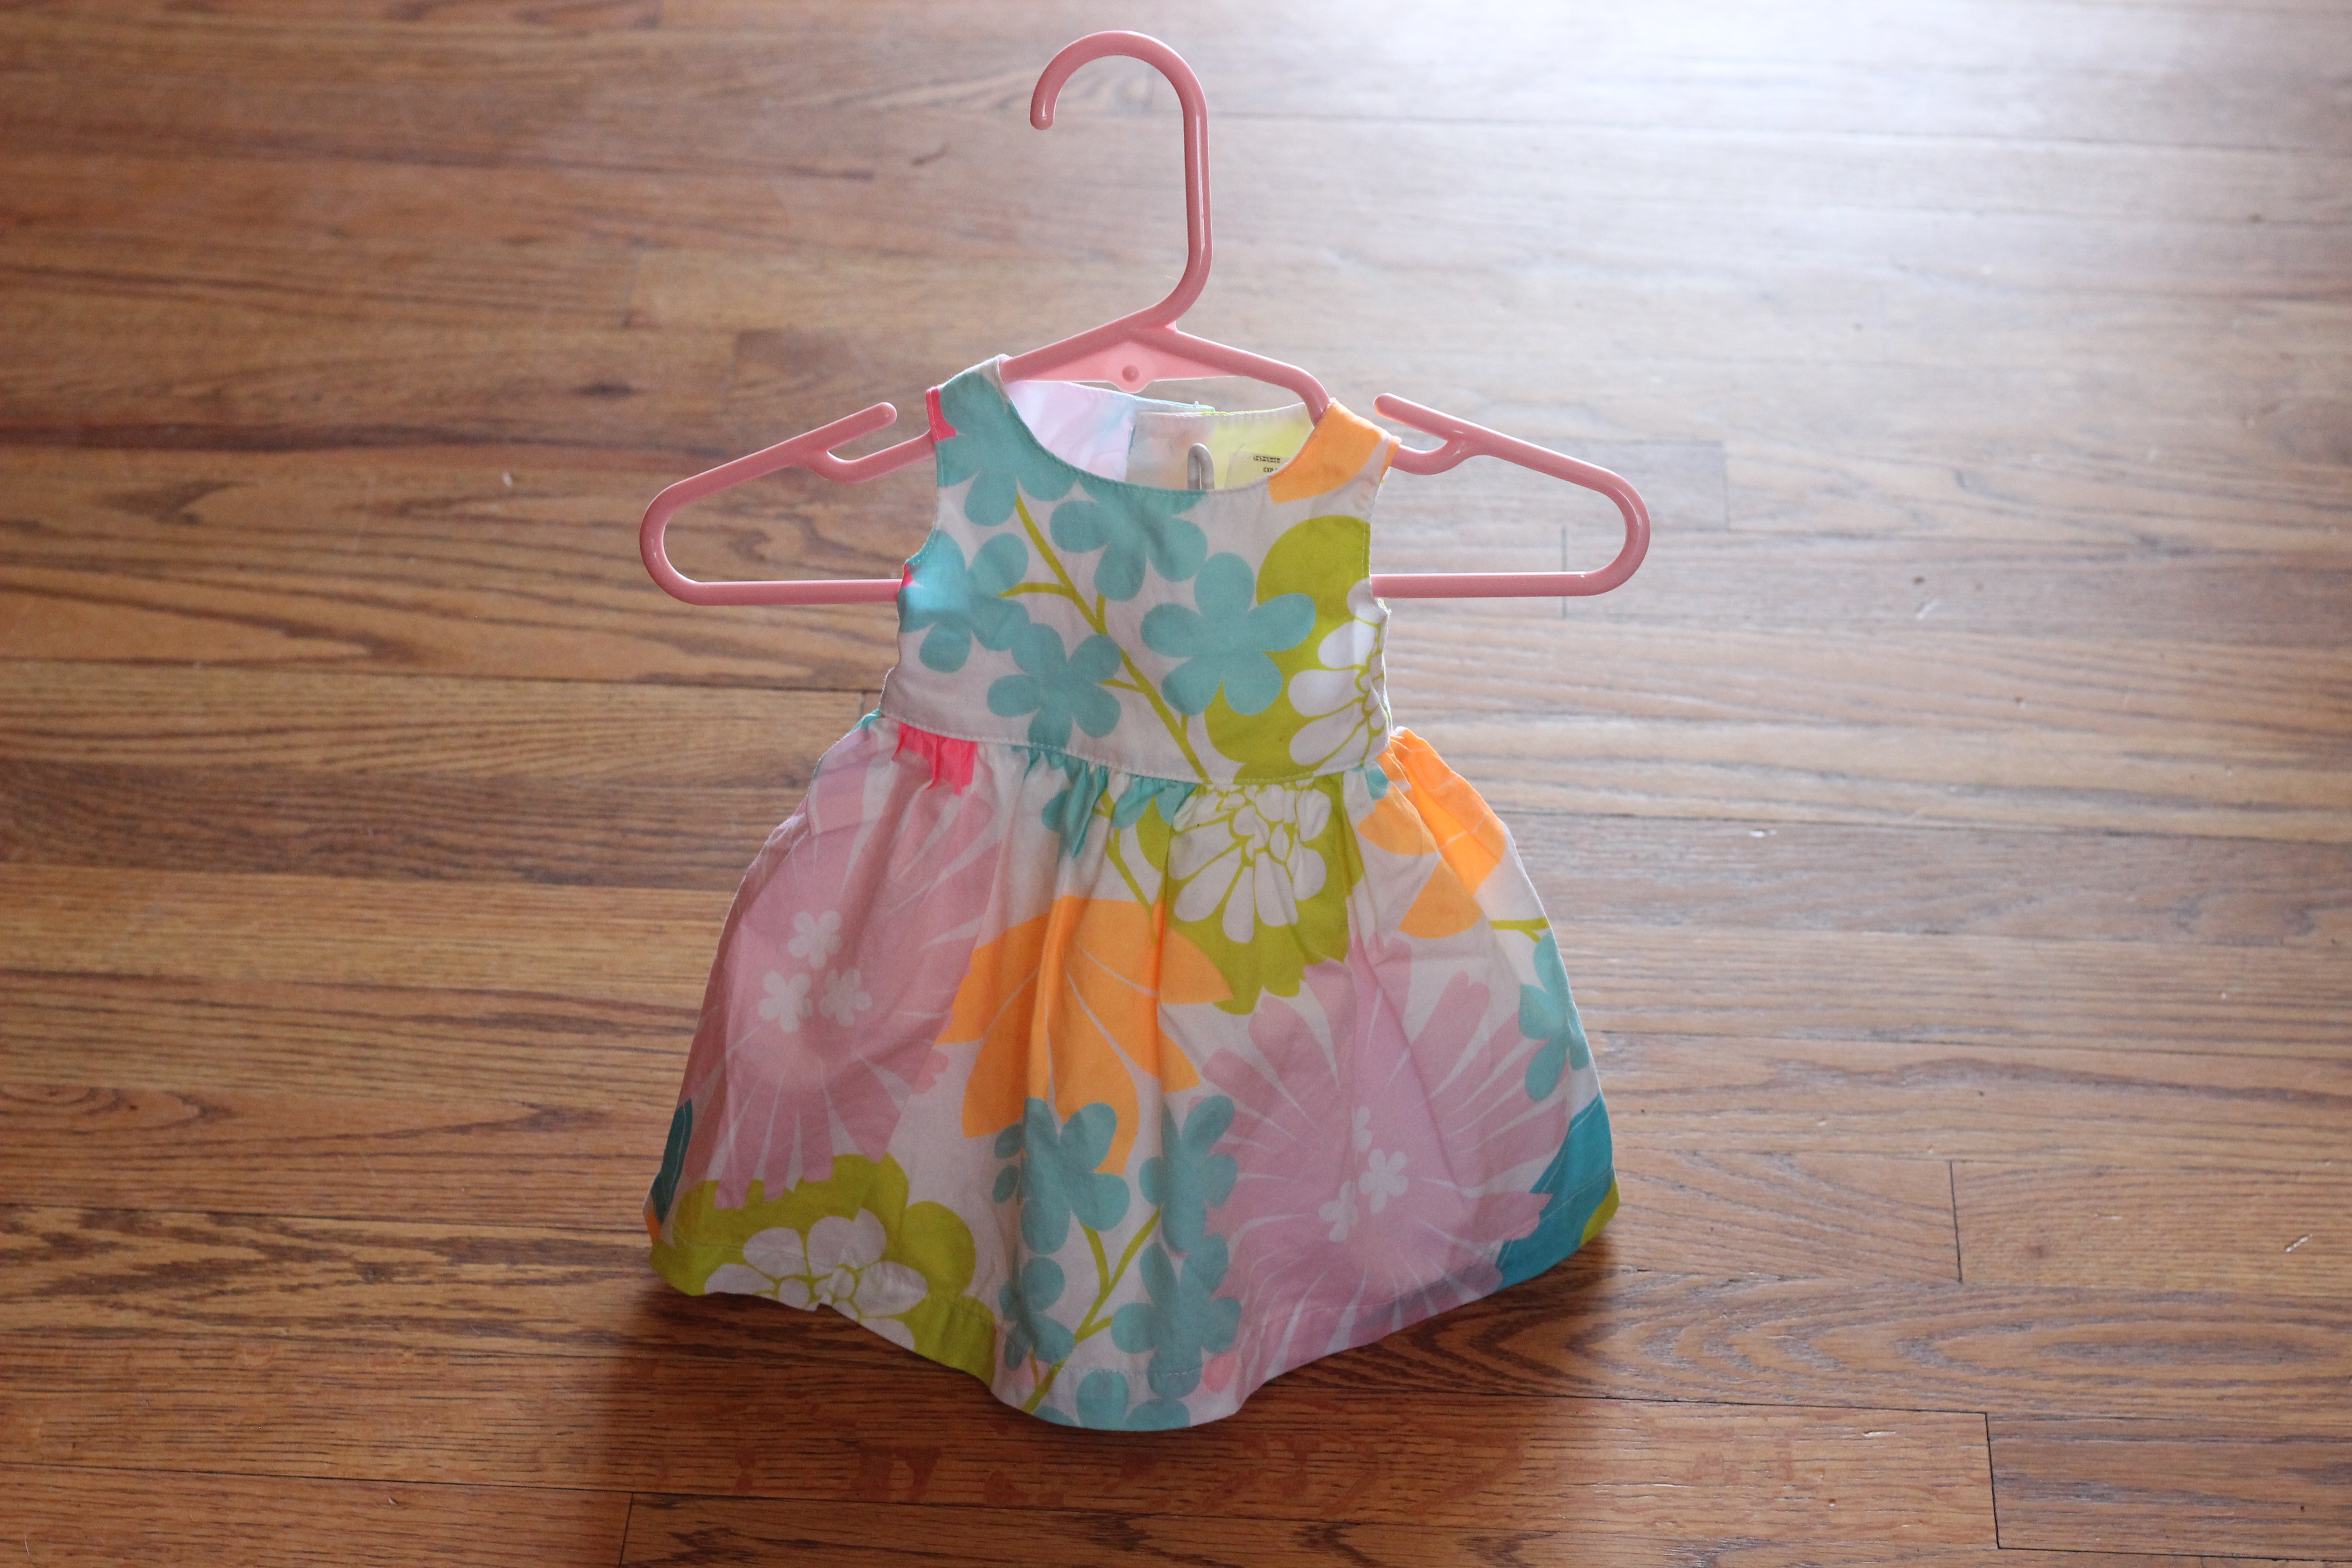
DIY Baby Dress Centerpiece

When I began planning Jessica’s baby shower, I came across this idea on Pinterest (source) but I had no idea how I would get the dresses to stand up. While picking Cory’s brain about what I could use, he mentioned that he thought he could build a stand for the dresses out of some material he had at work. I’m so blessed to have a super smart husband who designed and built the dress stands for me. Since I’ve had such a huge response on my Sweet Beginnings Baby Shower on how I was able to get the dresses stand up, I thought I would share the baby dress centerpiece tutorial.
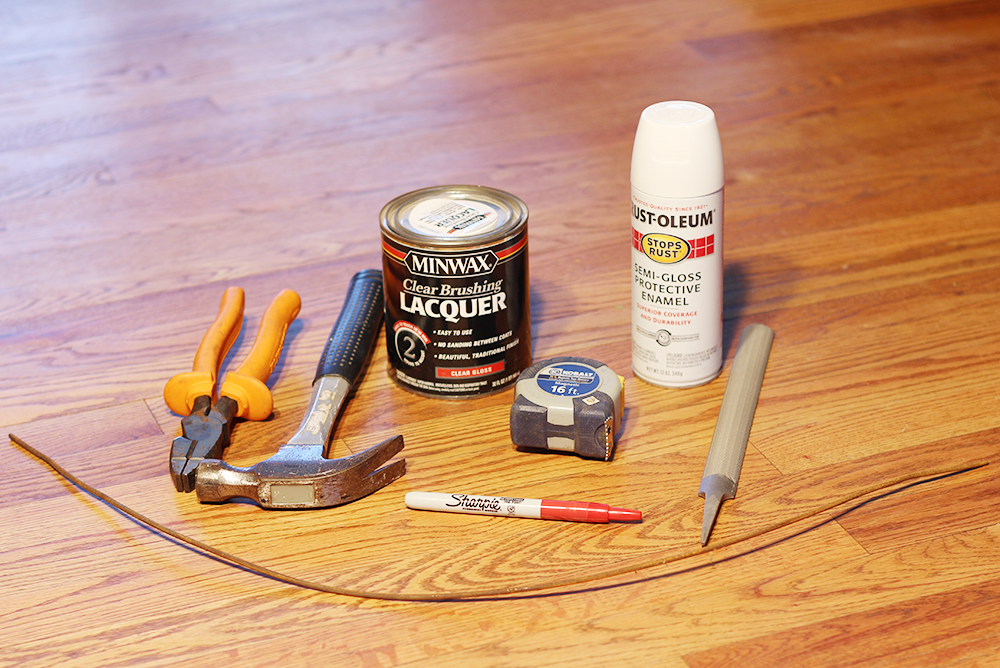
Supplies Needed:
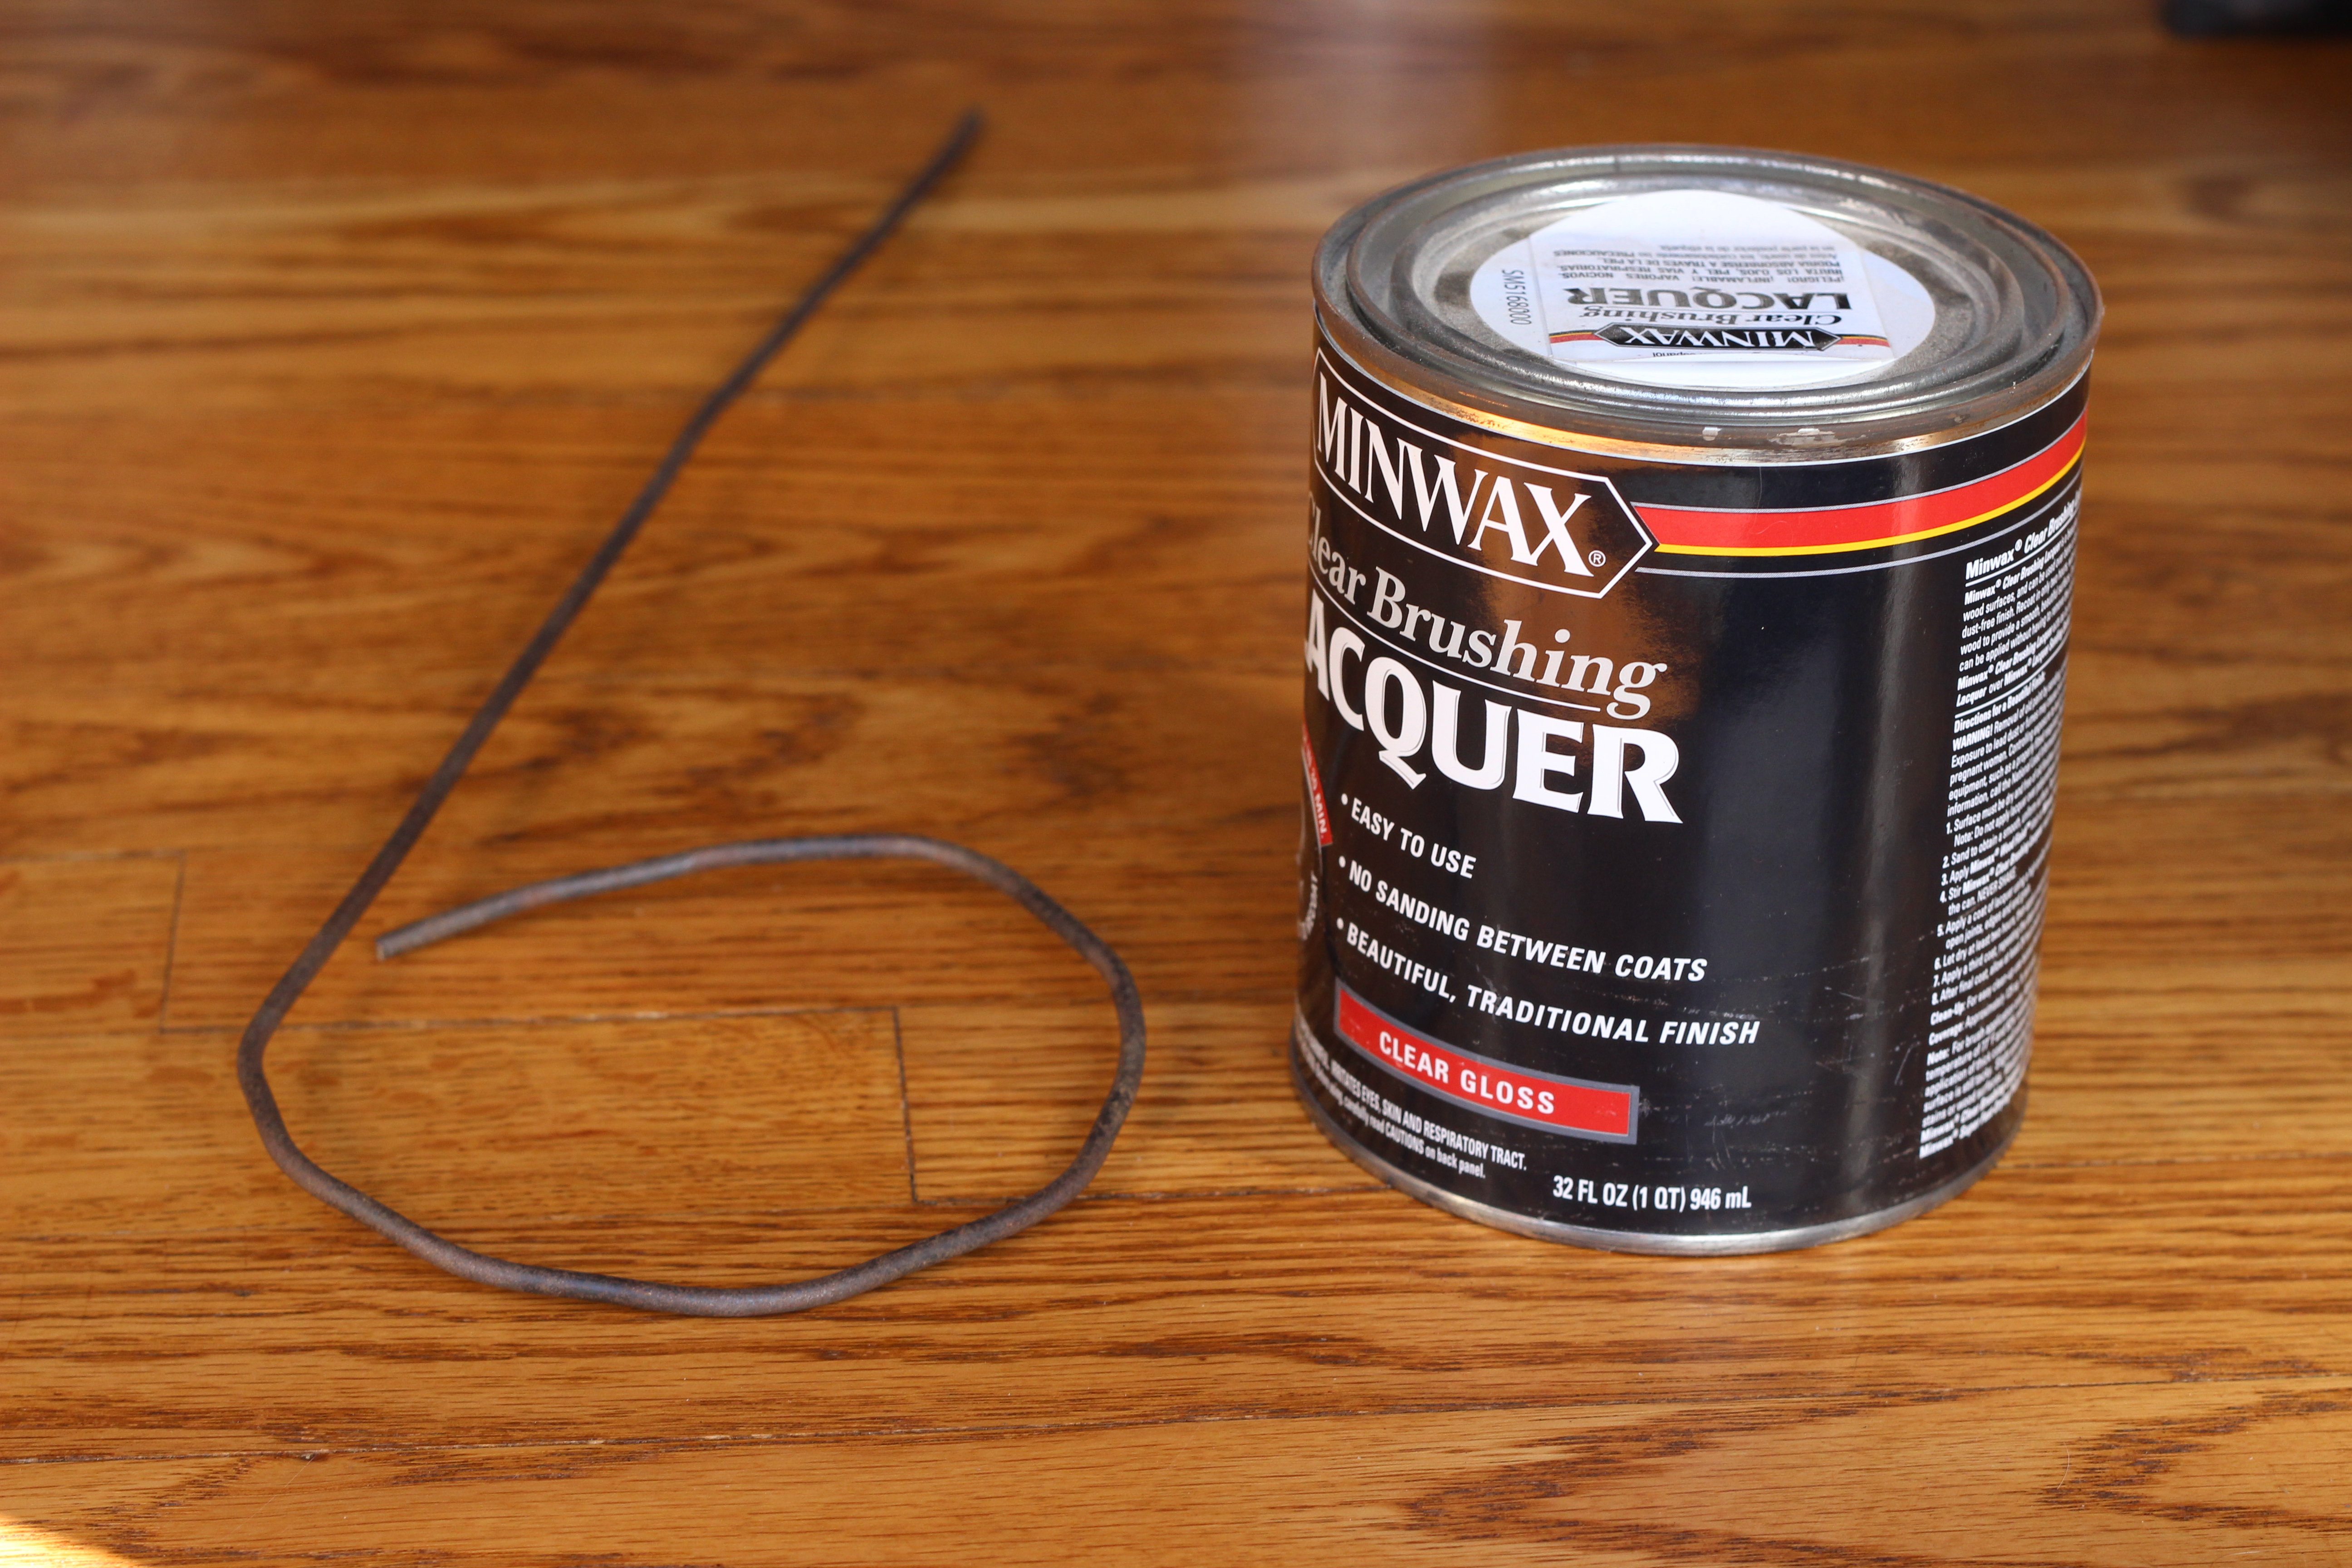
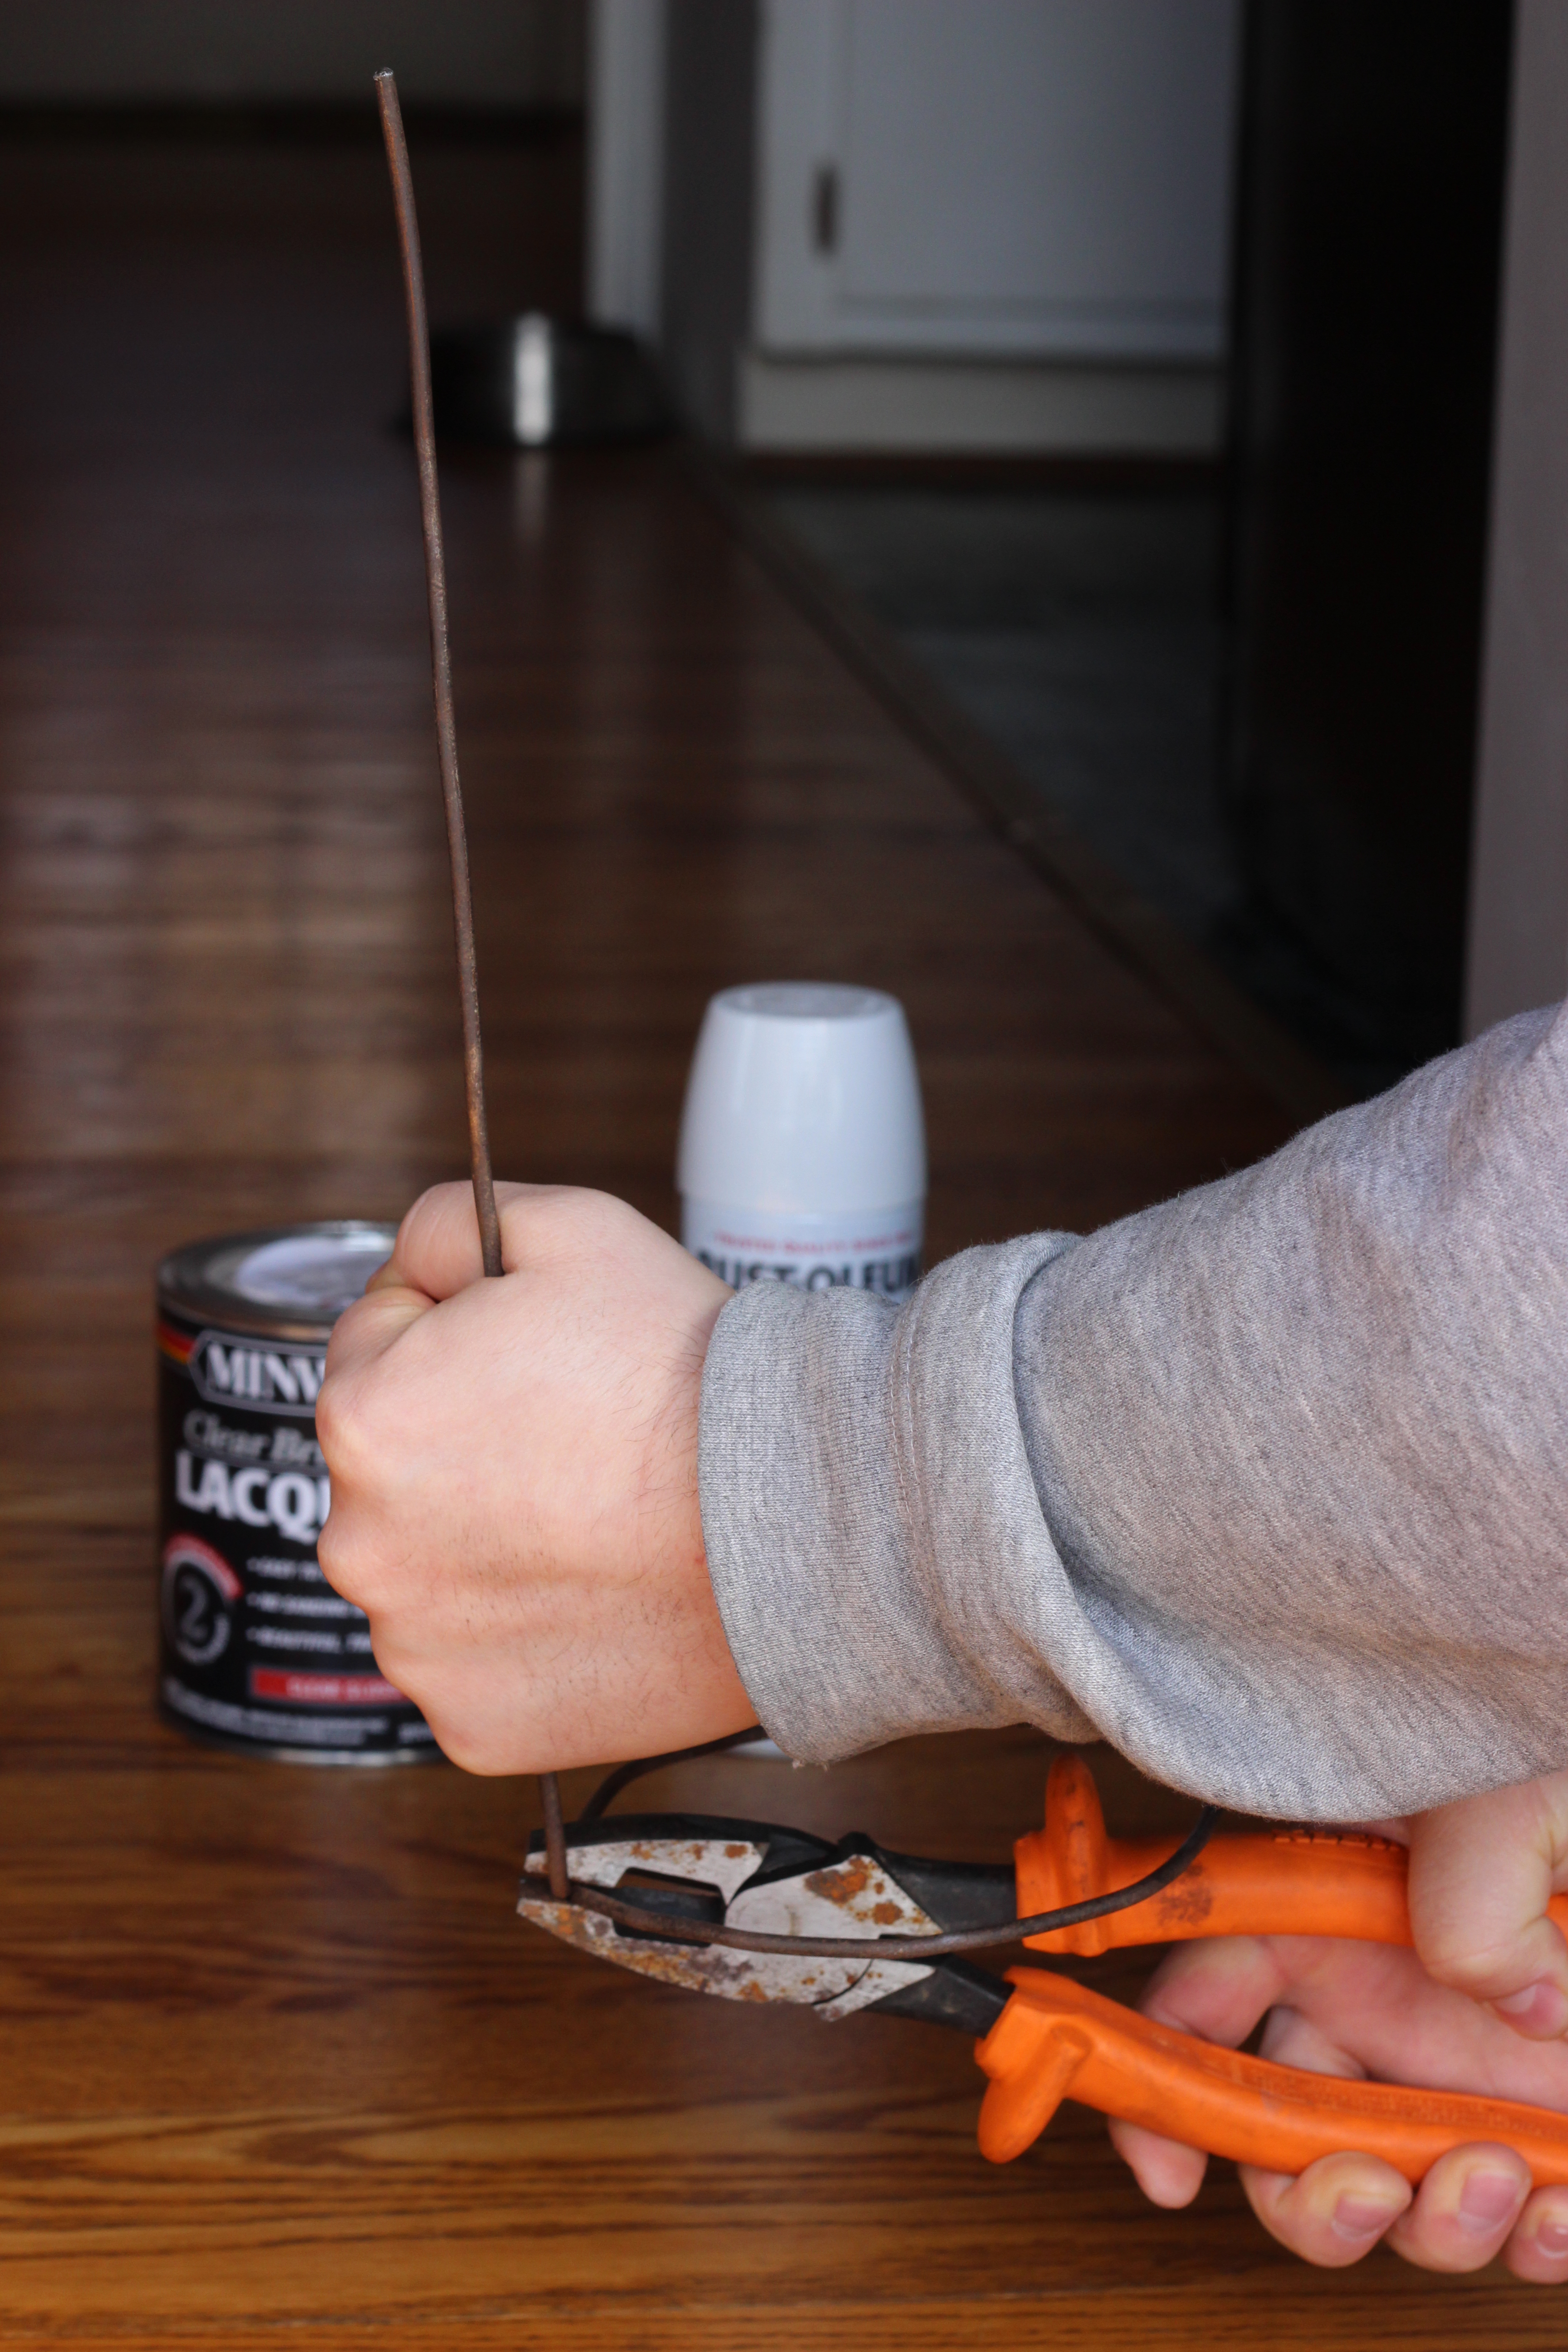
- 9 gauge wire
- Heavy duty side cutting pliers
- Quart paint can (or something similar)
- Metal file
- Tape measure
- Sharpie
- Hammer
- Spray paint (I used Rust-Oleum Semi-Gloss Protective Enamel)
At any point during this tutorial, if you mess up just straighten the wire back out with pliers, hammer or your hands and start the step over.
Prepping:
1. Using pliers, cut the wire to desired length. The length will vary depending on the length of the dress you are using and in this tutorial, the dress I am using measured 11 inches long. For our stand, we used 16 inches to form the base plus 9 inches for the rod plus 4 inches for the “U” shaped hook bring the total length of the wire to 30 inches.
2. Make sure that the wire is a straight and as kink free as possible. You can do this with pliers and a hammer or your hands if it is easier.
3. Once cut to length, sand the wire with Scotch Brite and clean with soapy water. This is prepping the wire for paint so you don’t have to do it after it is bent.
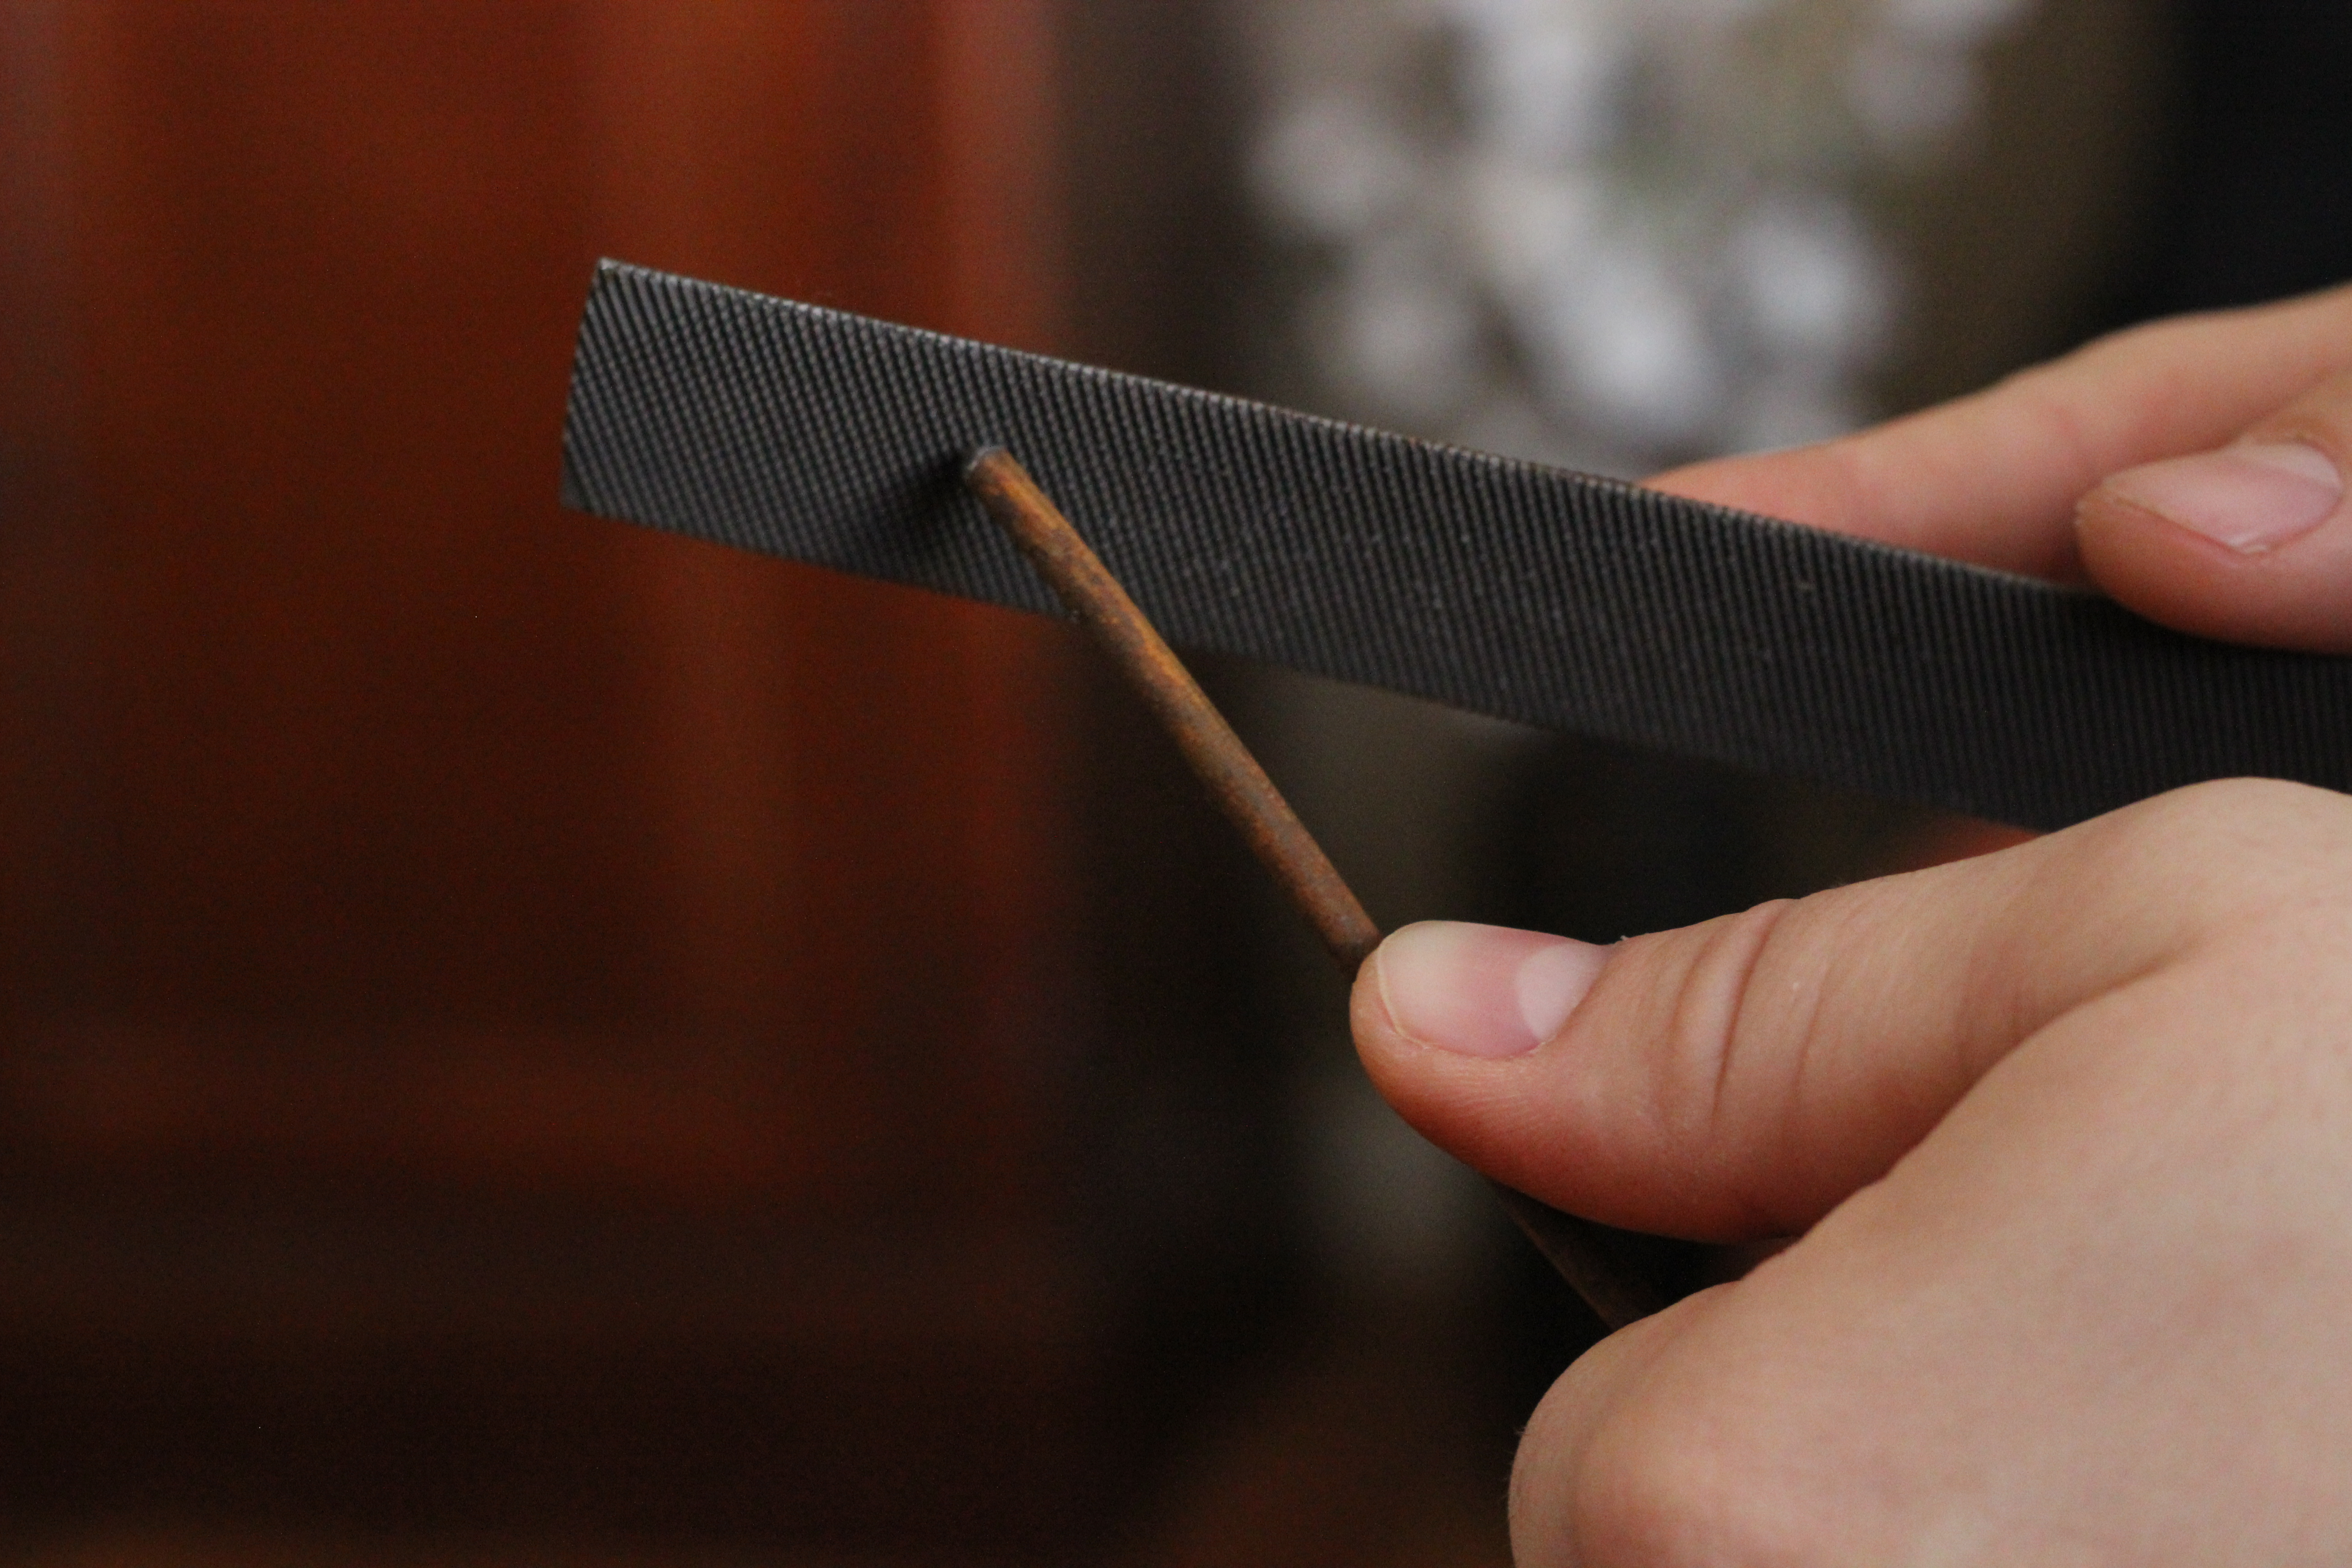
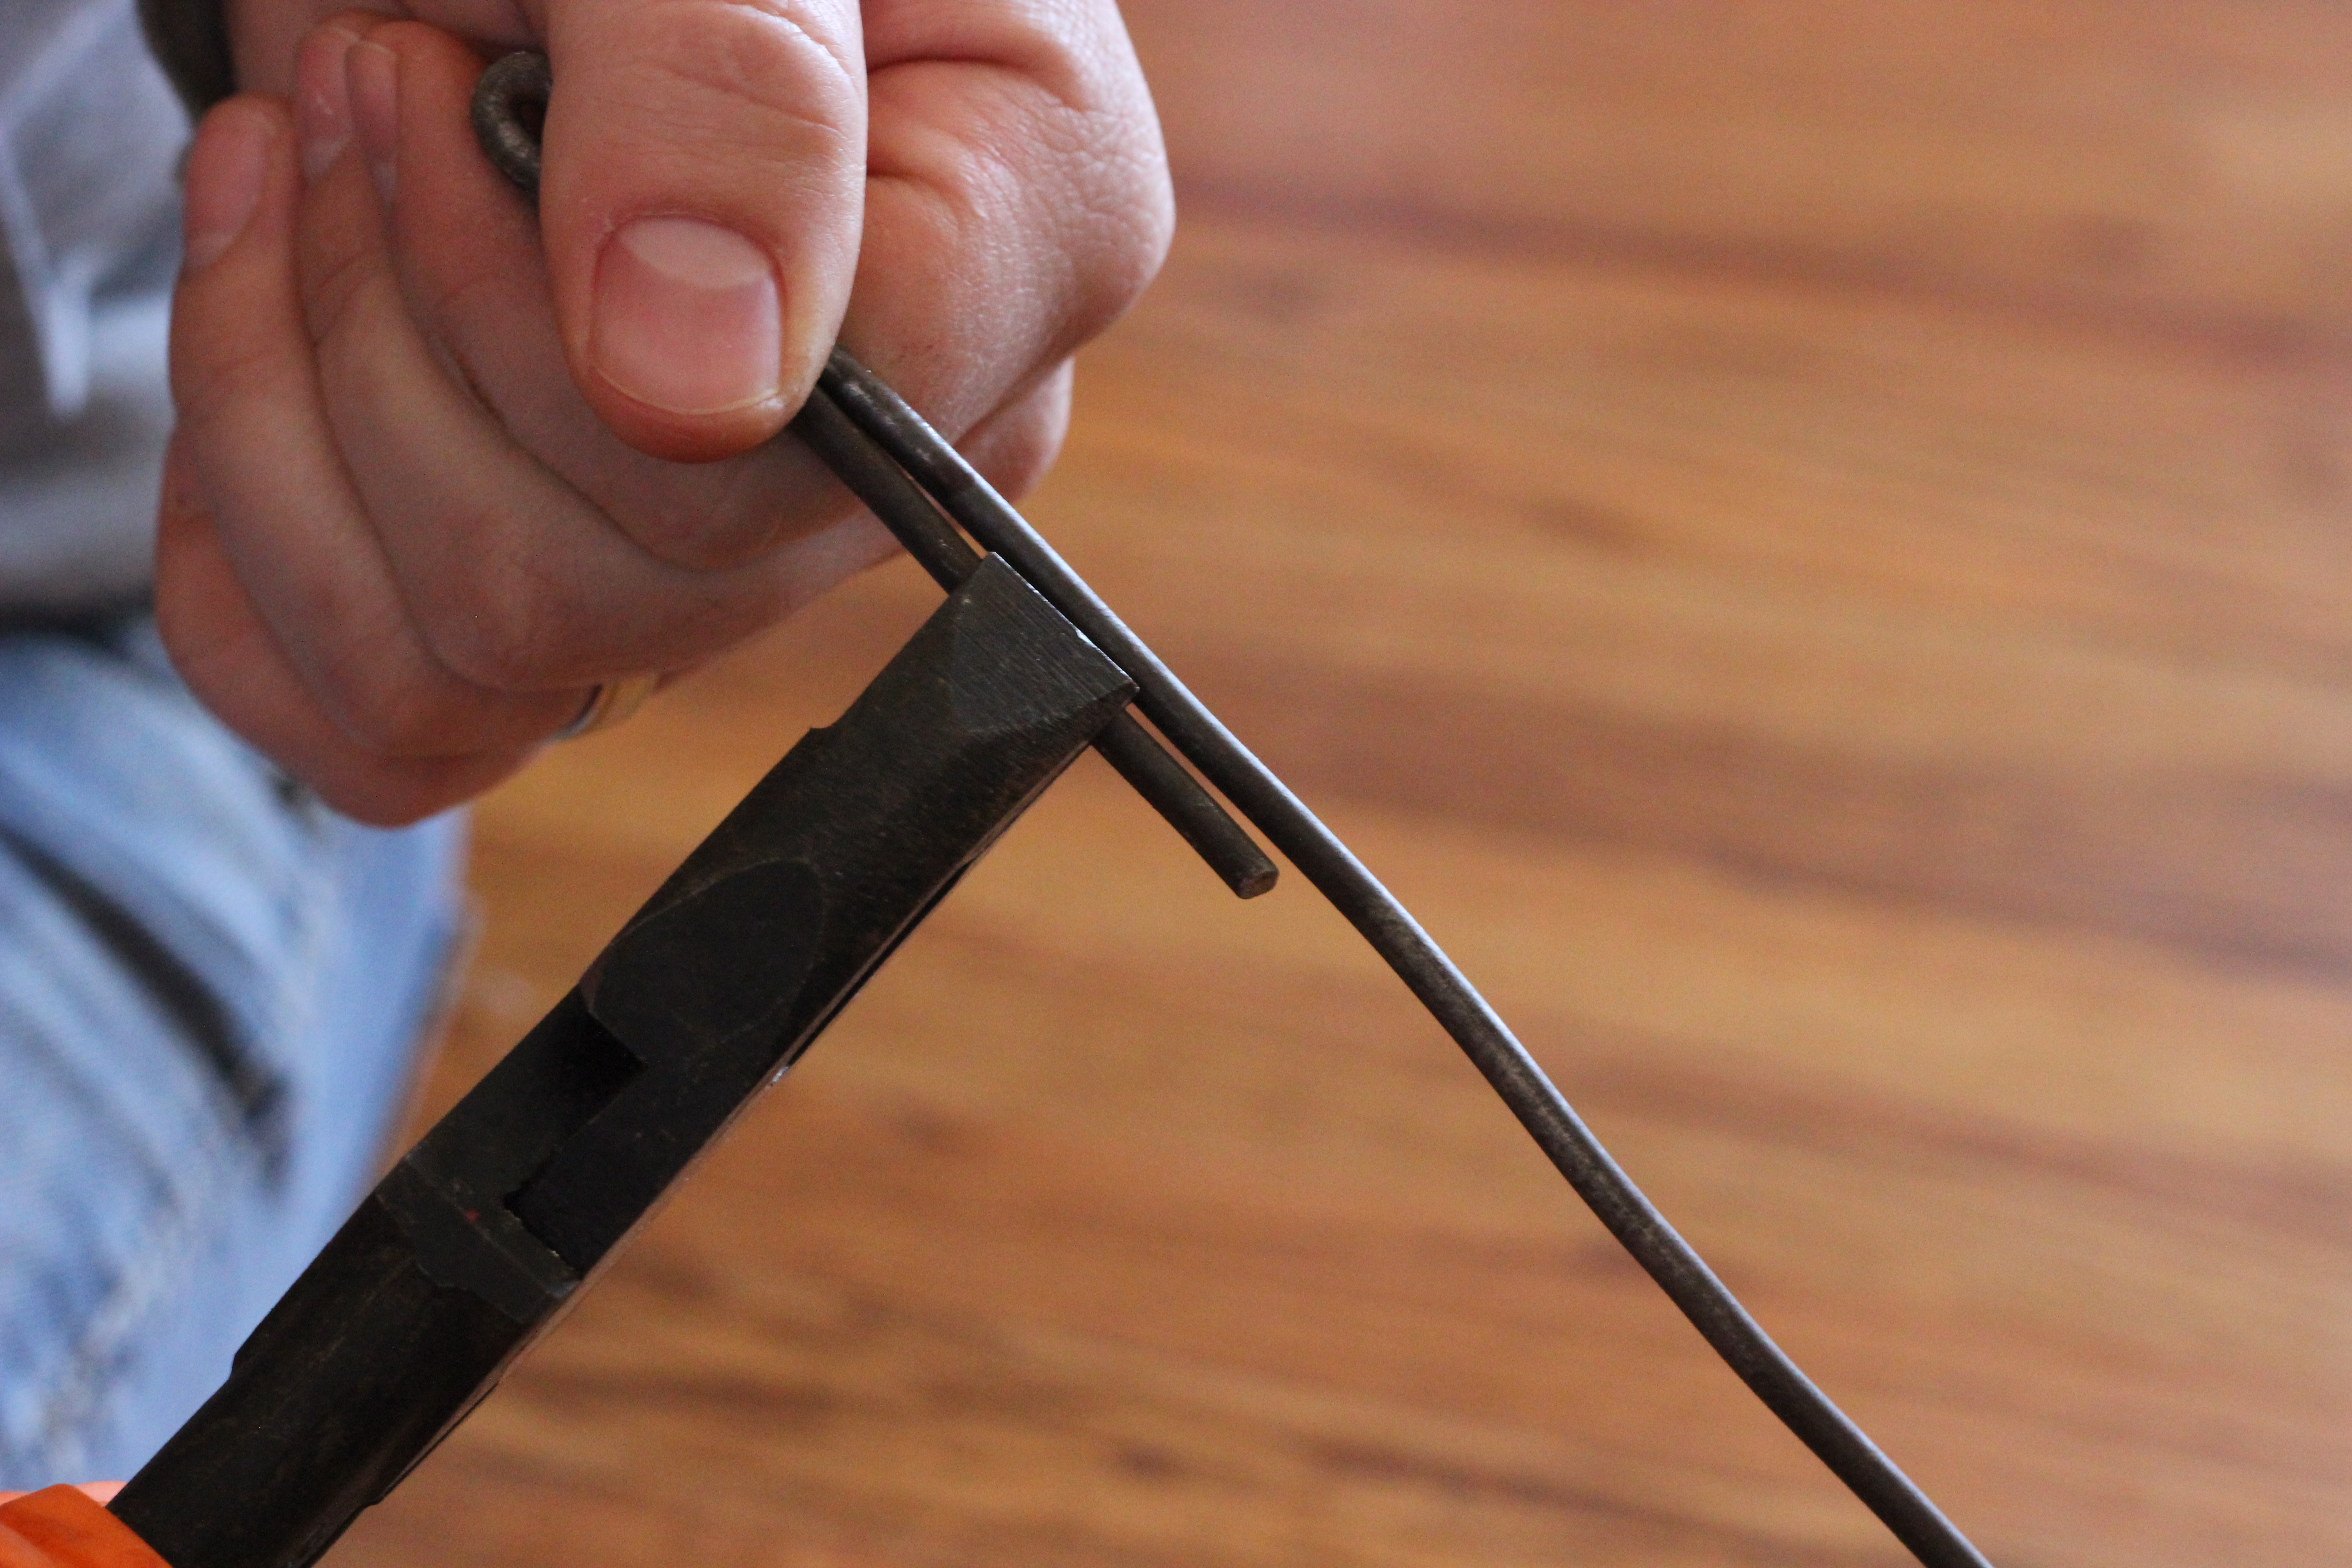
4. Using a file, round off the cut edges. This is done so that no one is cut or the dress doesn’t get picked by the rough edges.

Forming:
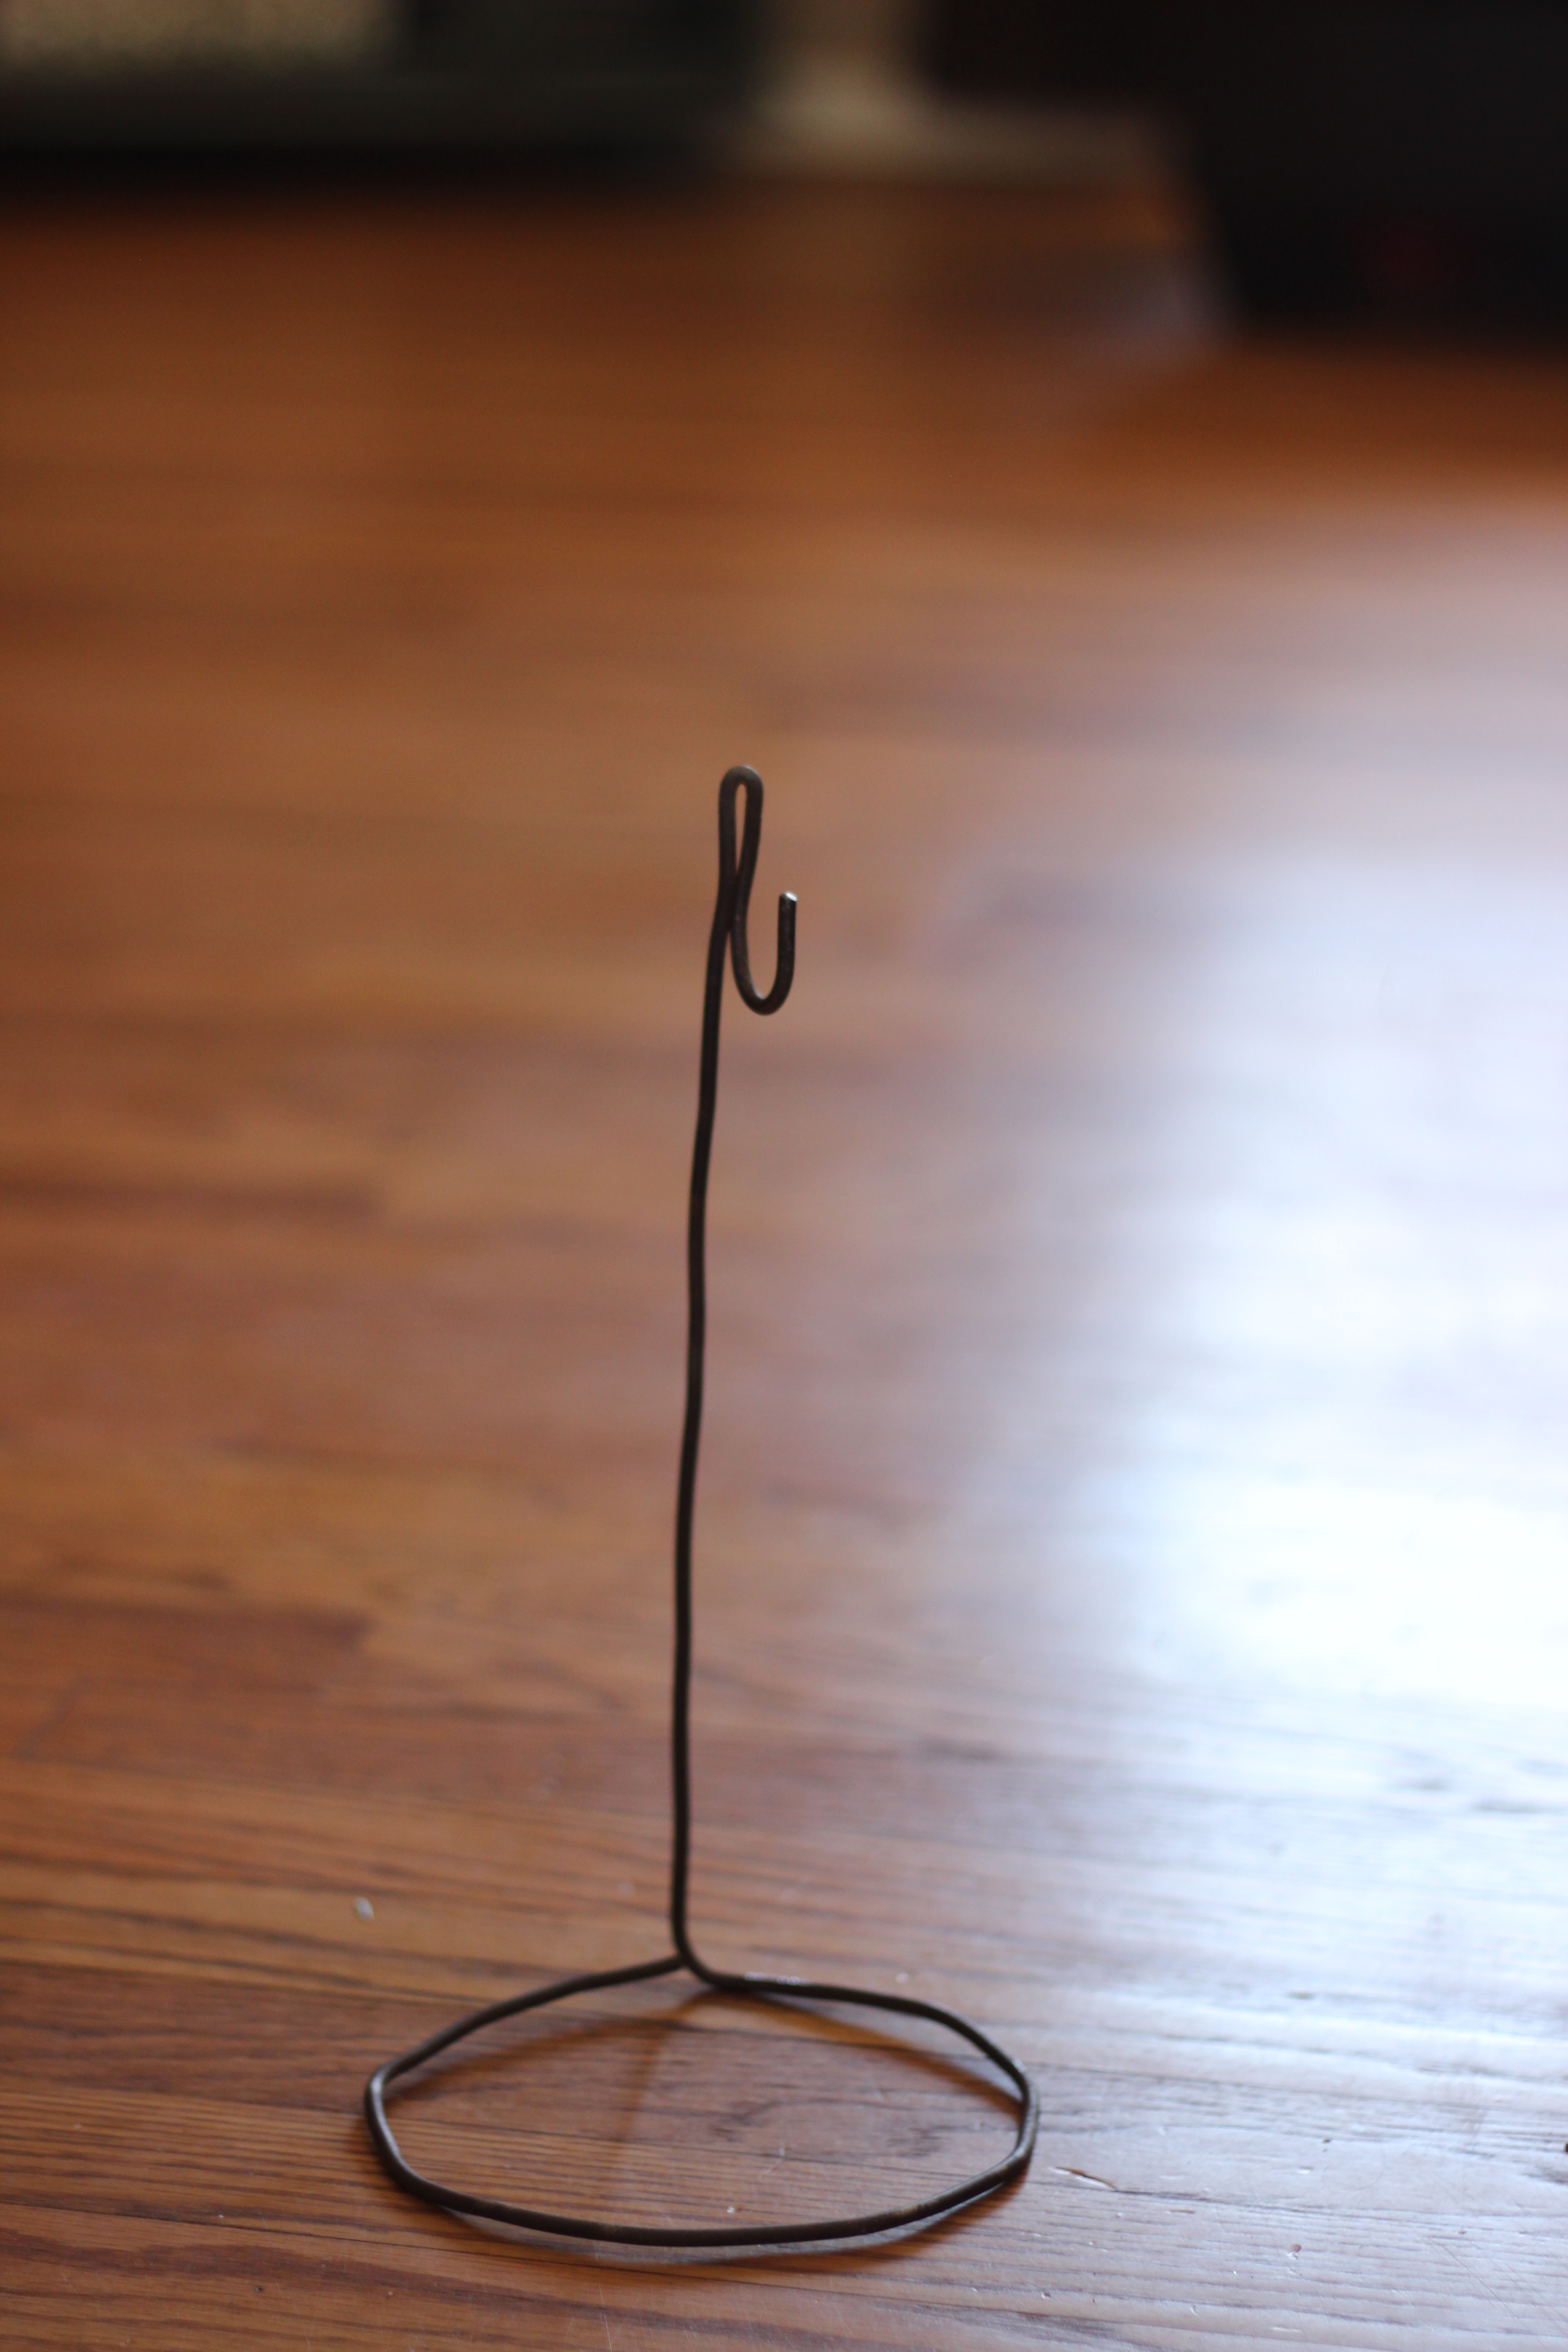
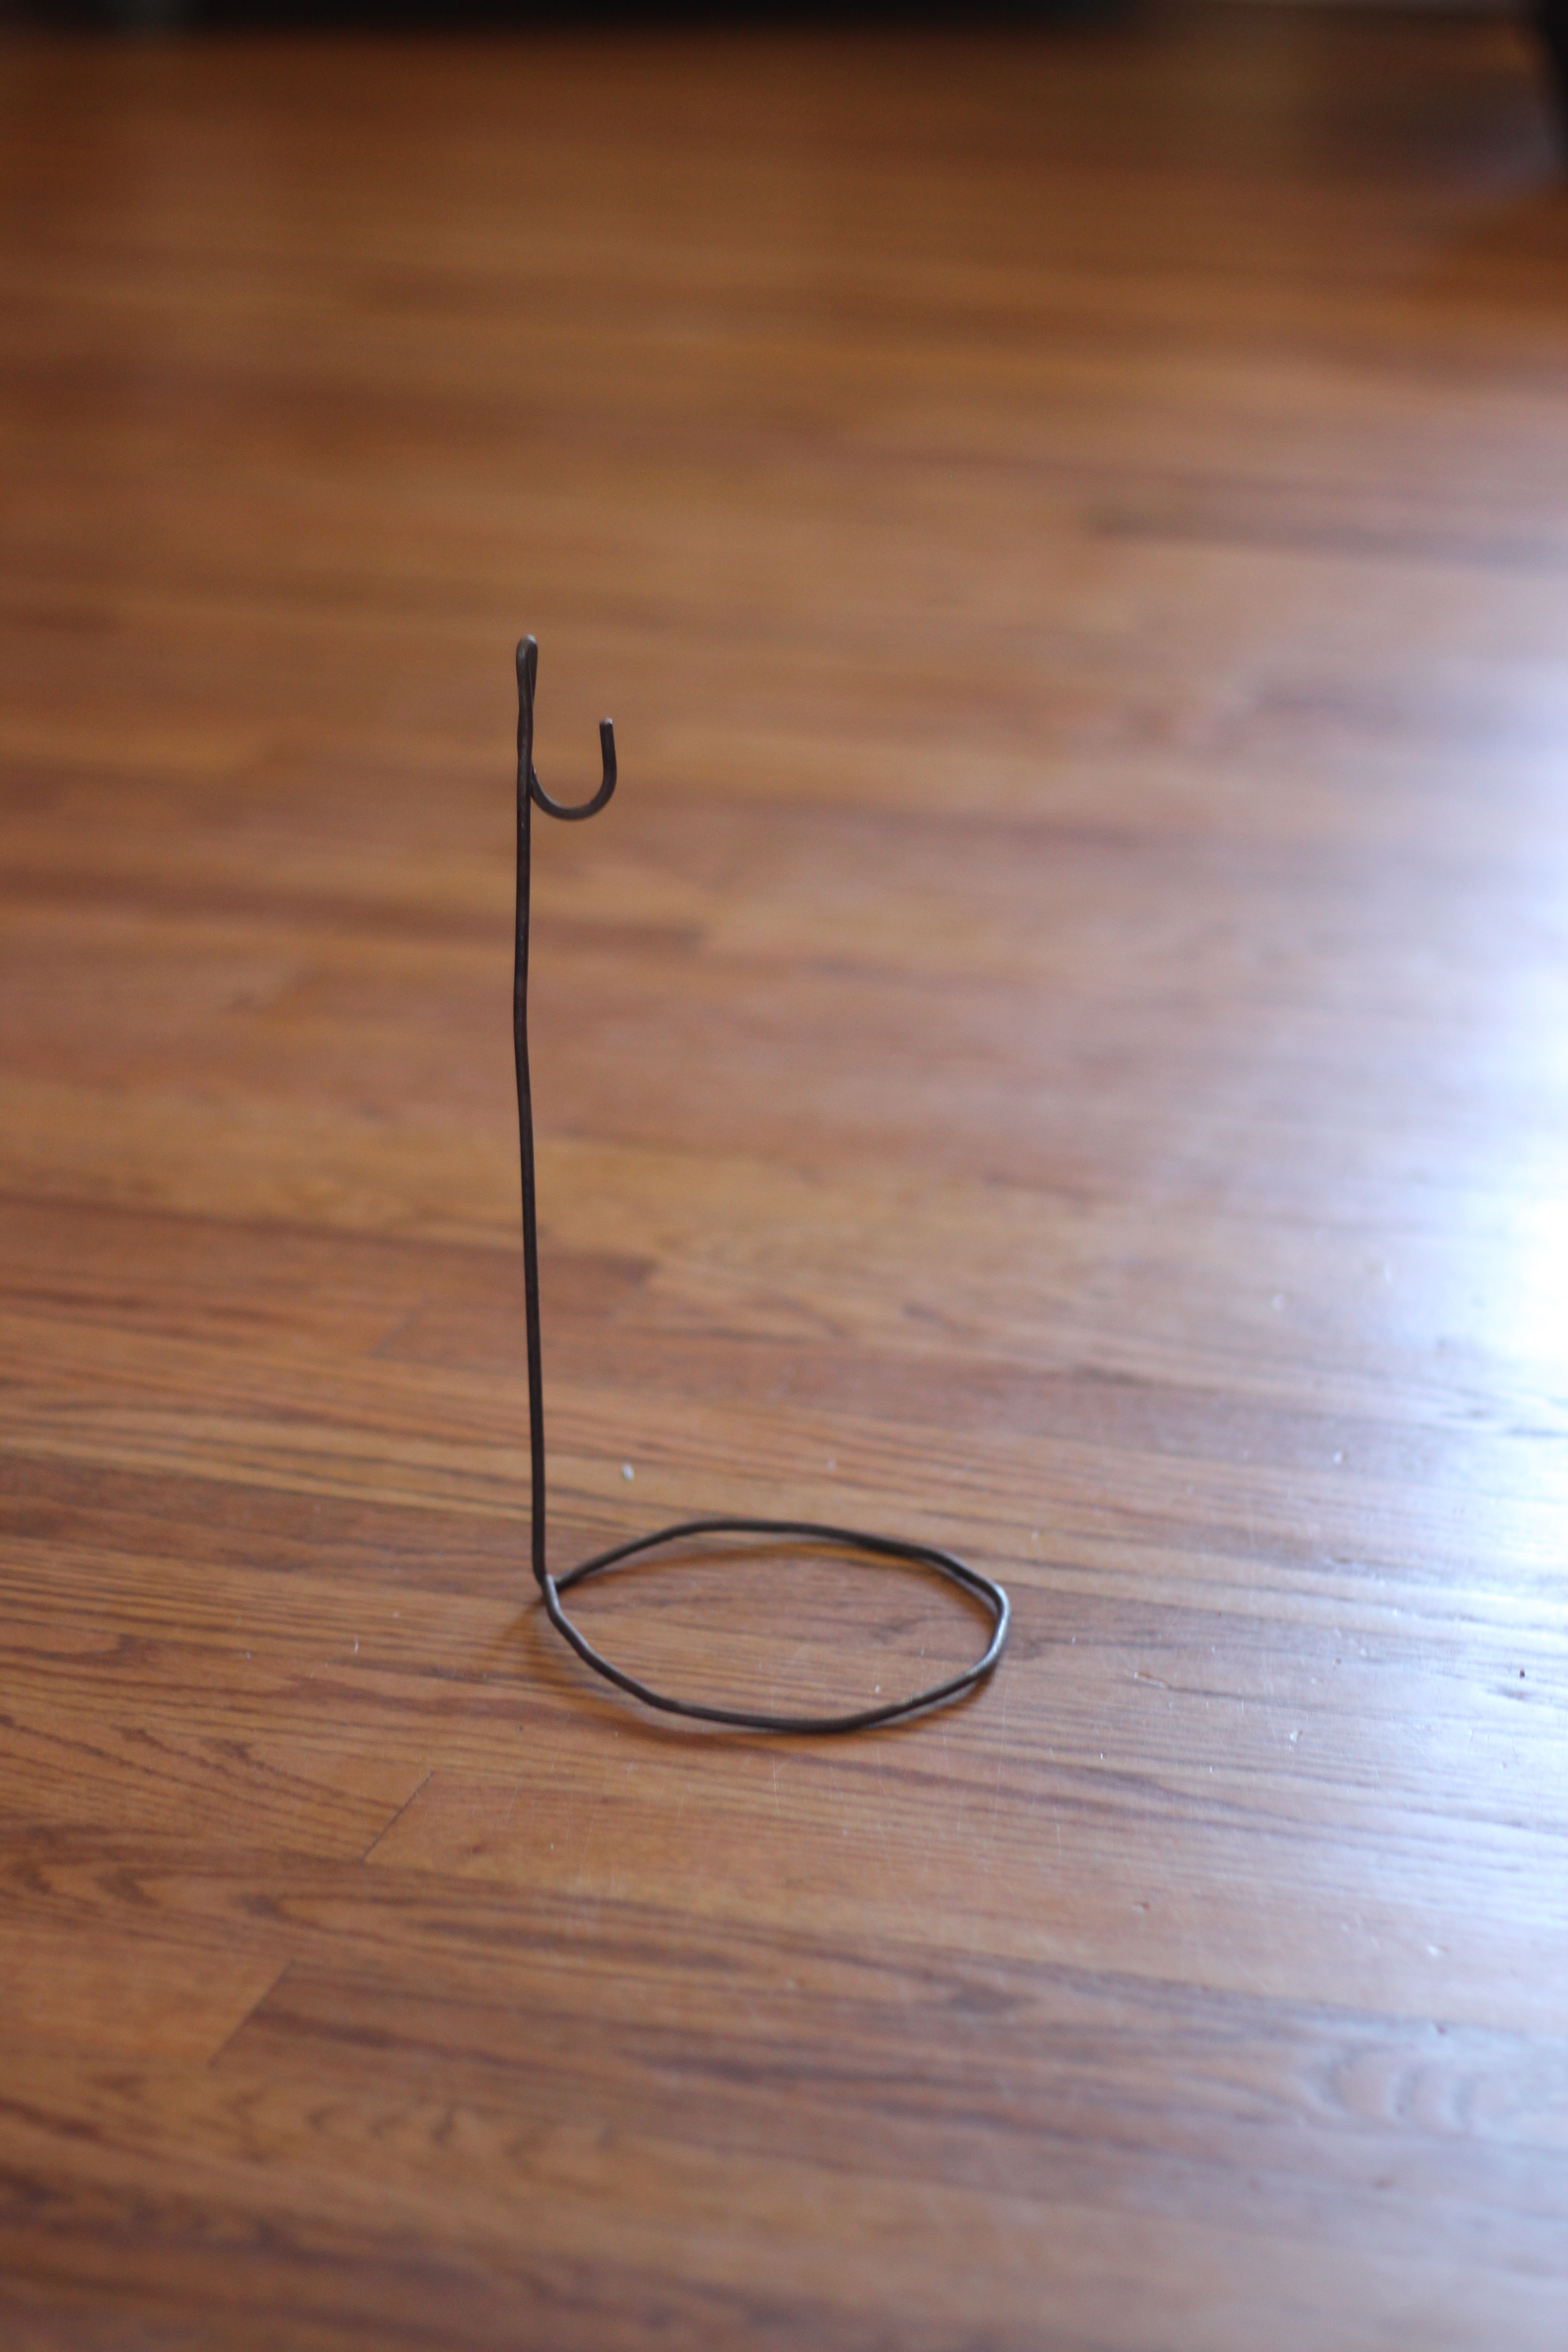
1. Use your paint can (or something similar) to shape the base of the stand with. On one end of the wire, bend it around the paint can, as closely as possible, to make a circle.
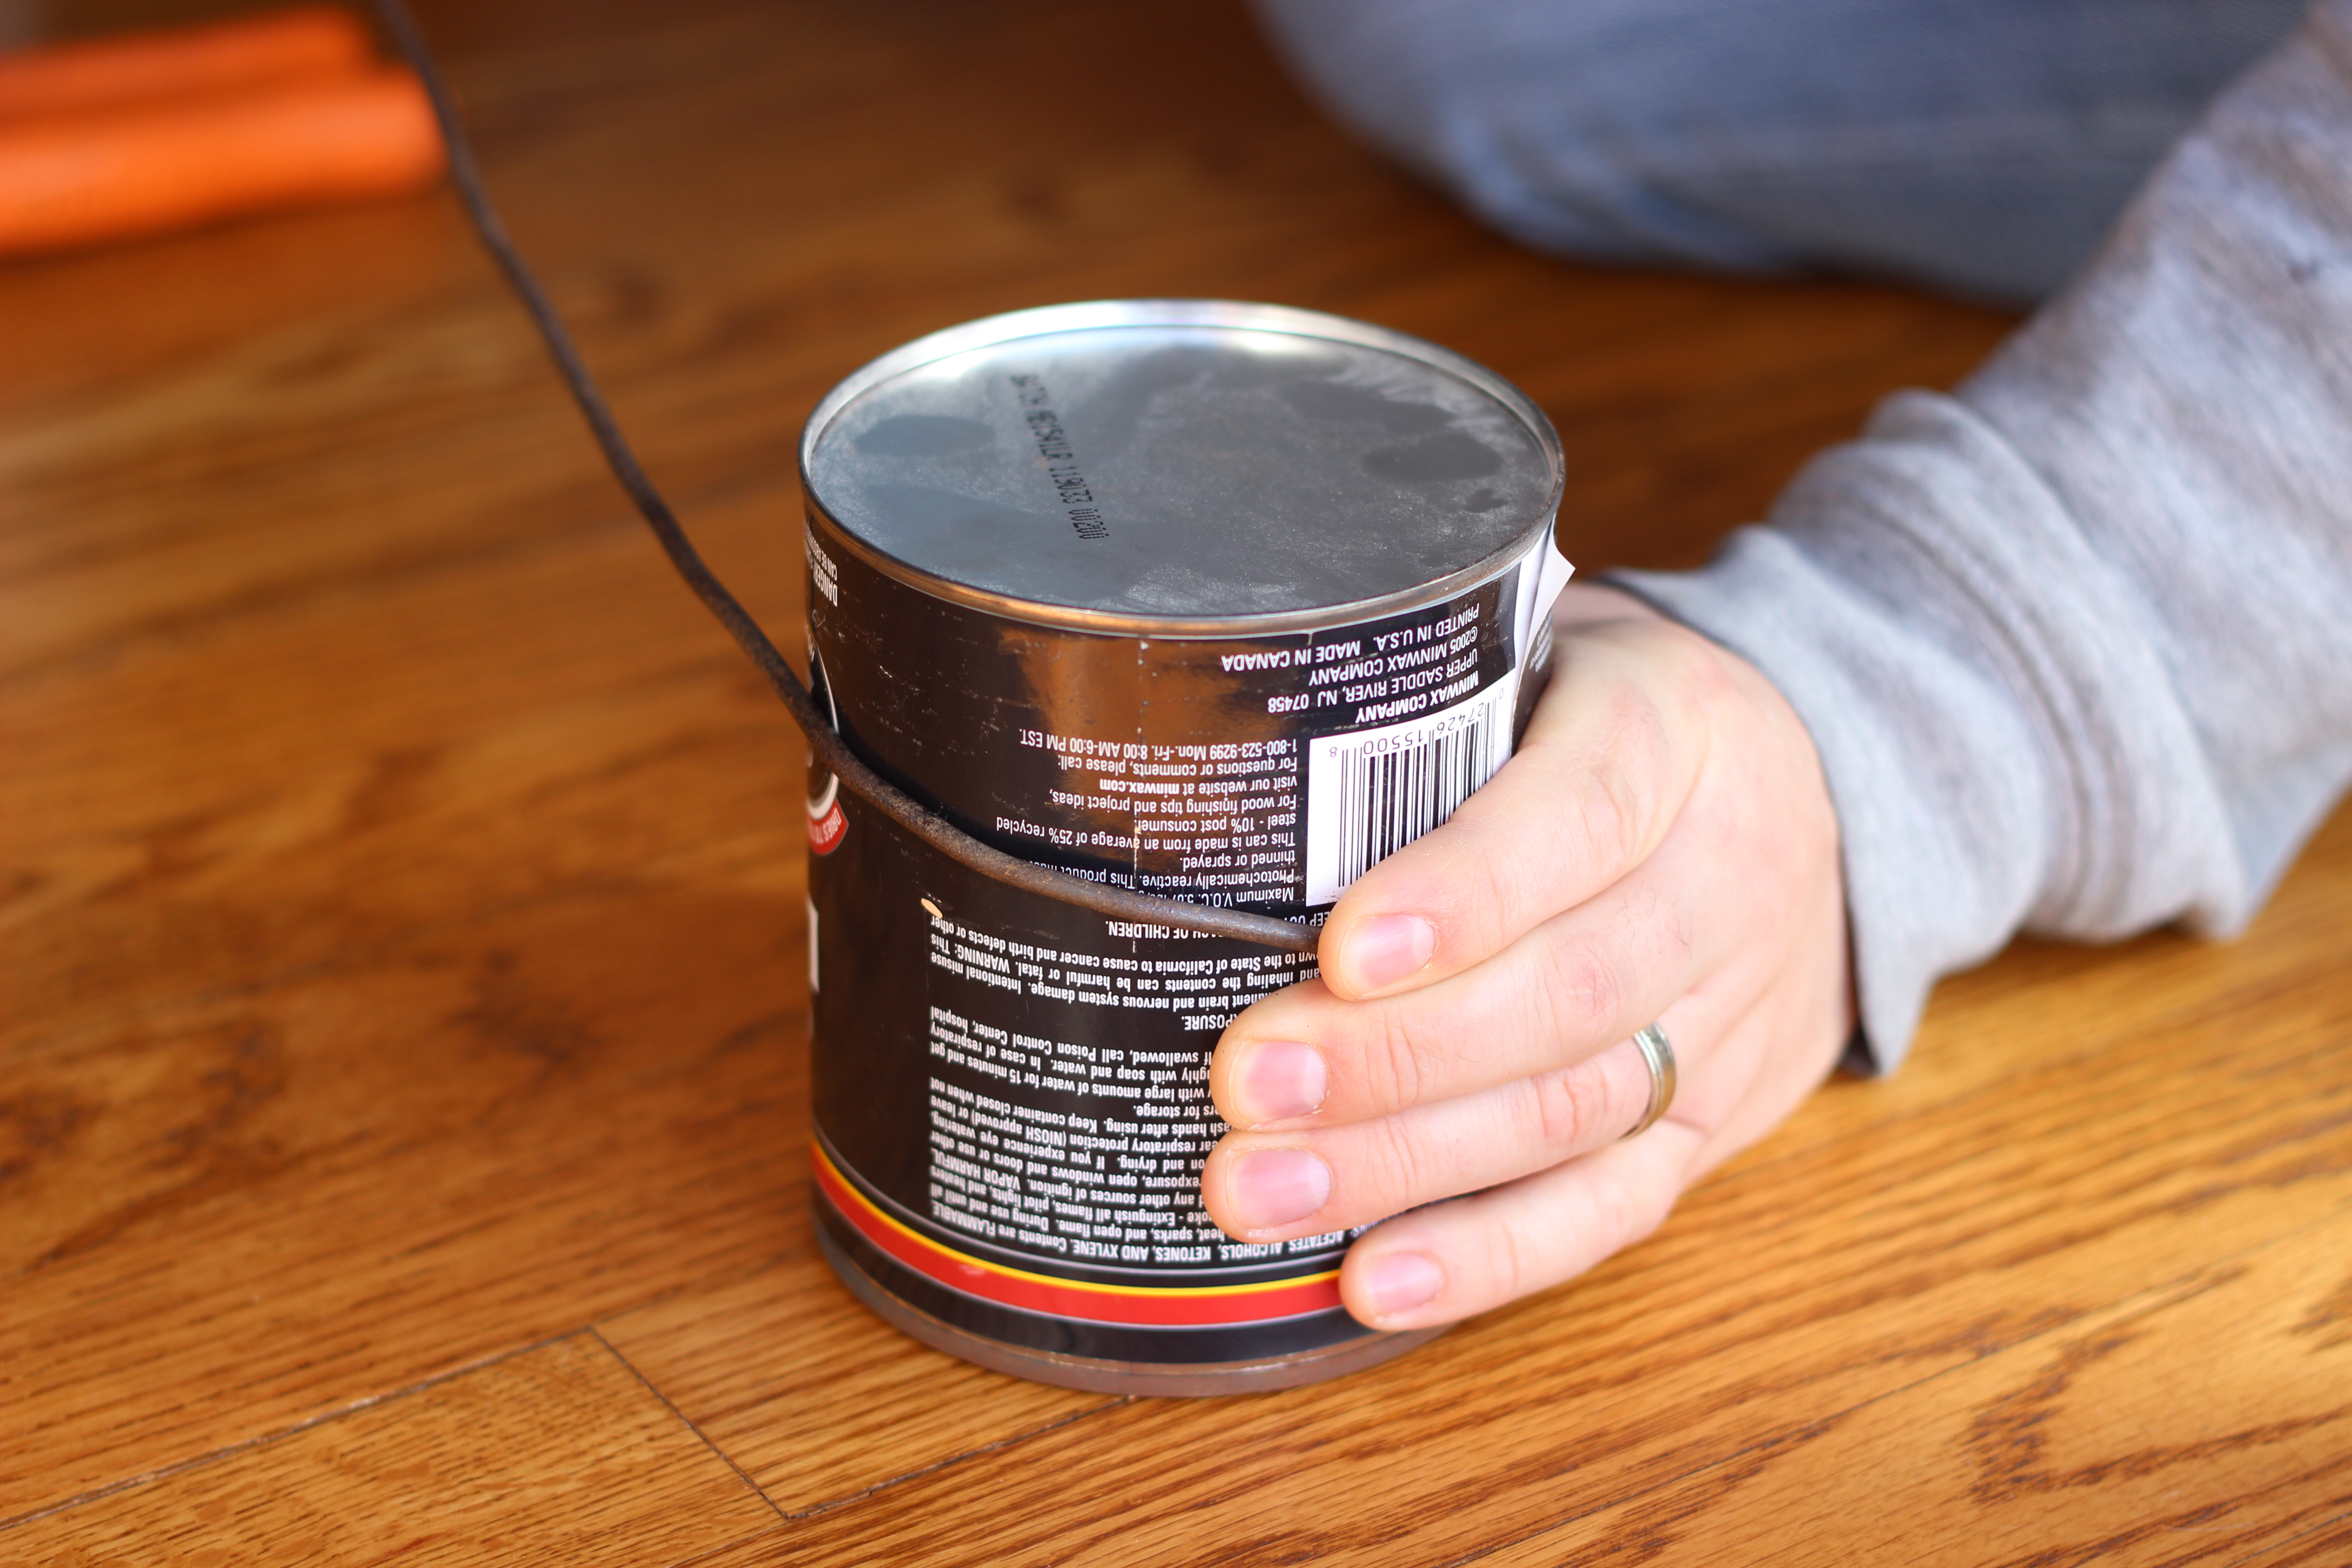
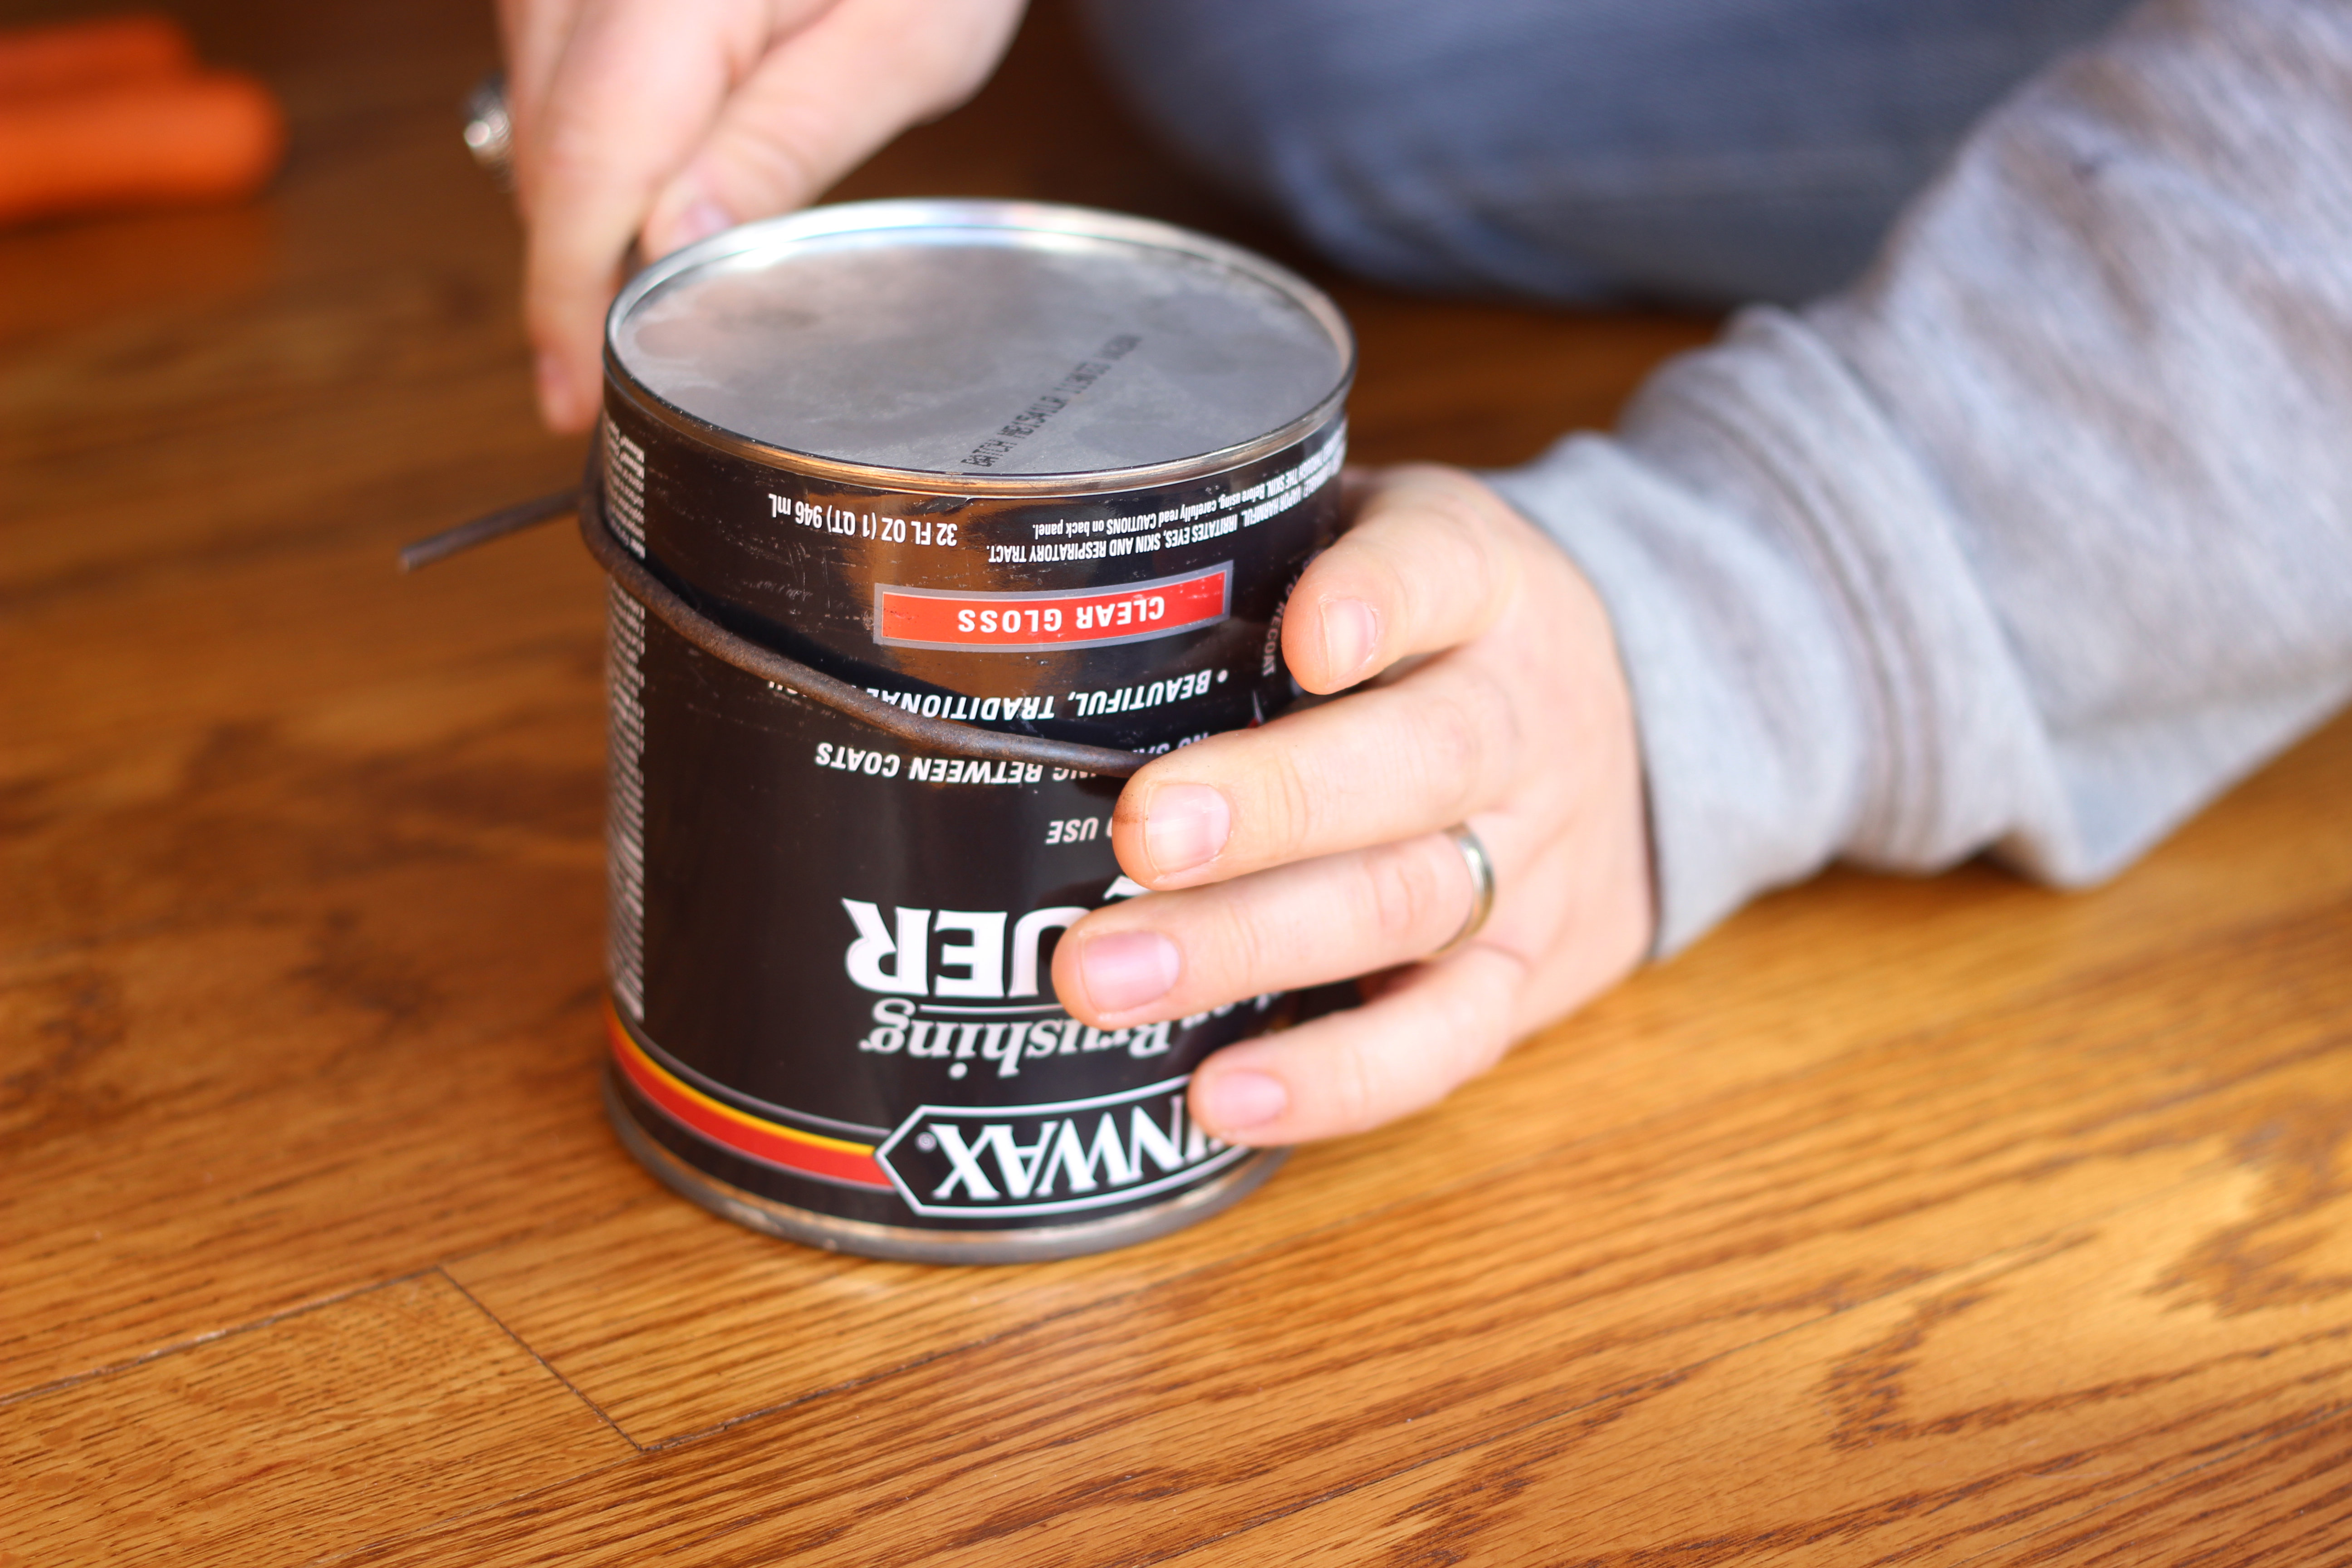
2. Once you’ve gone all the way around the can and you meet the end of the wire, bend the remaining wire in a 90 degree angle perpendicular to the circle. At this point, the stand should be able to stand on its own.


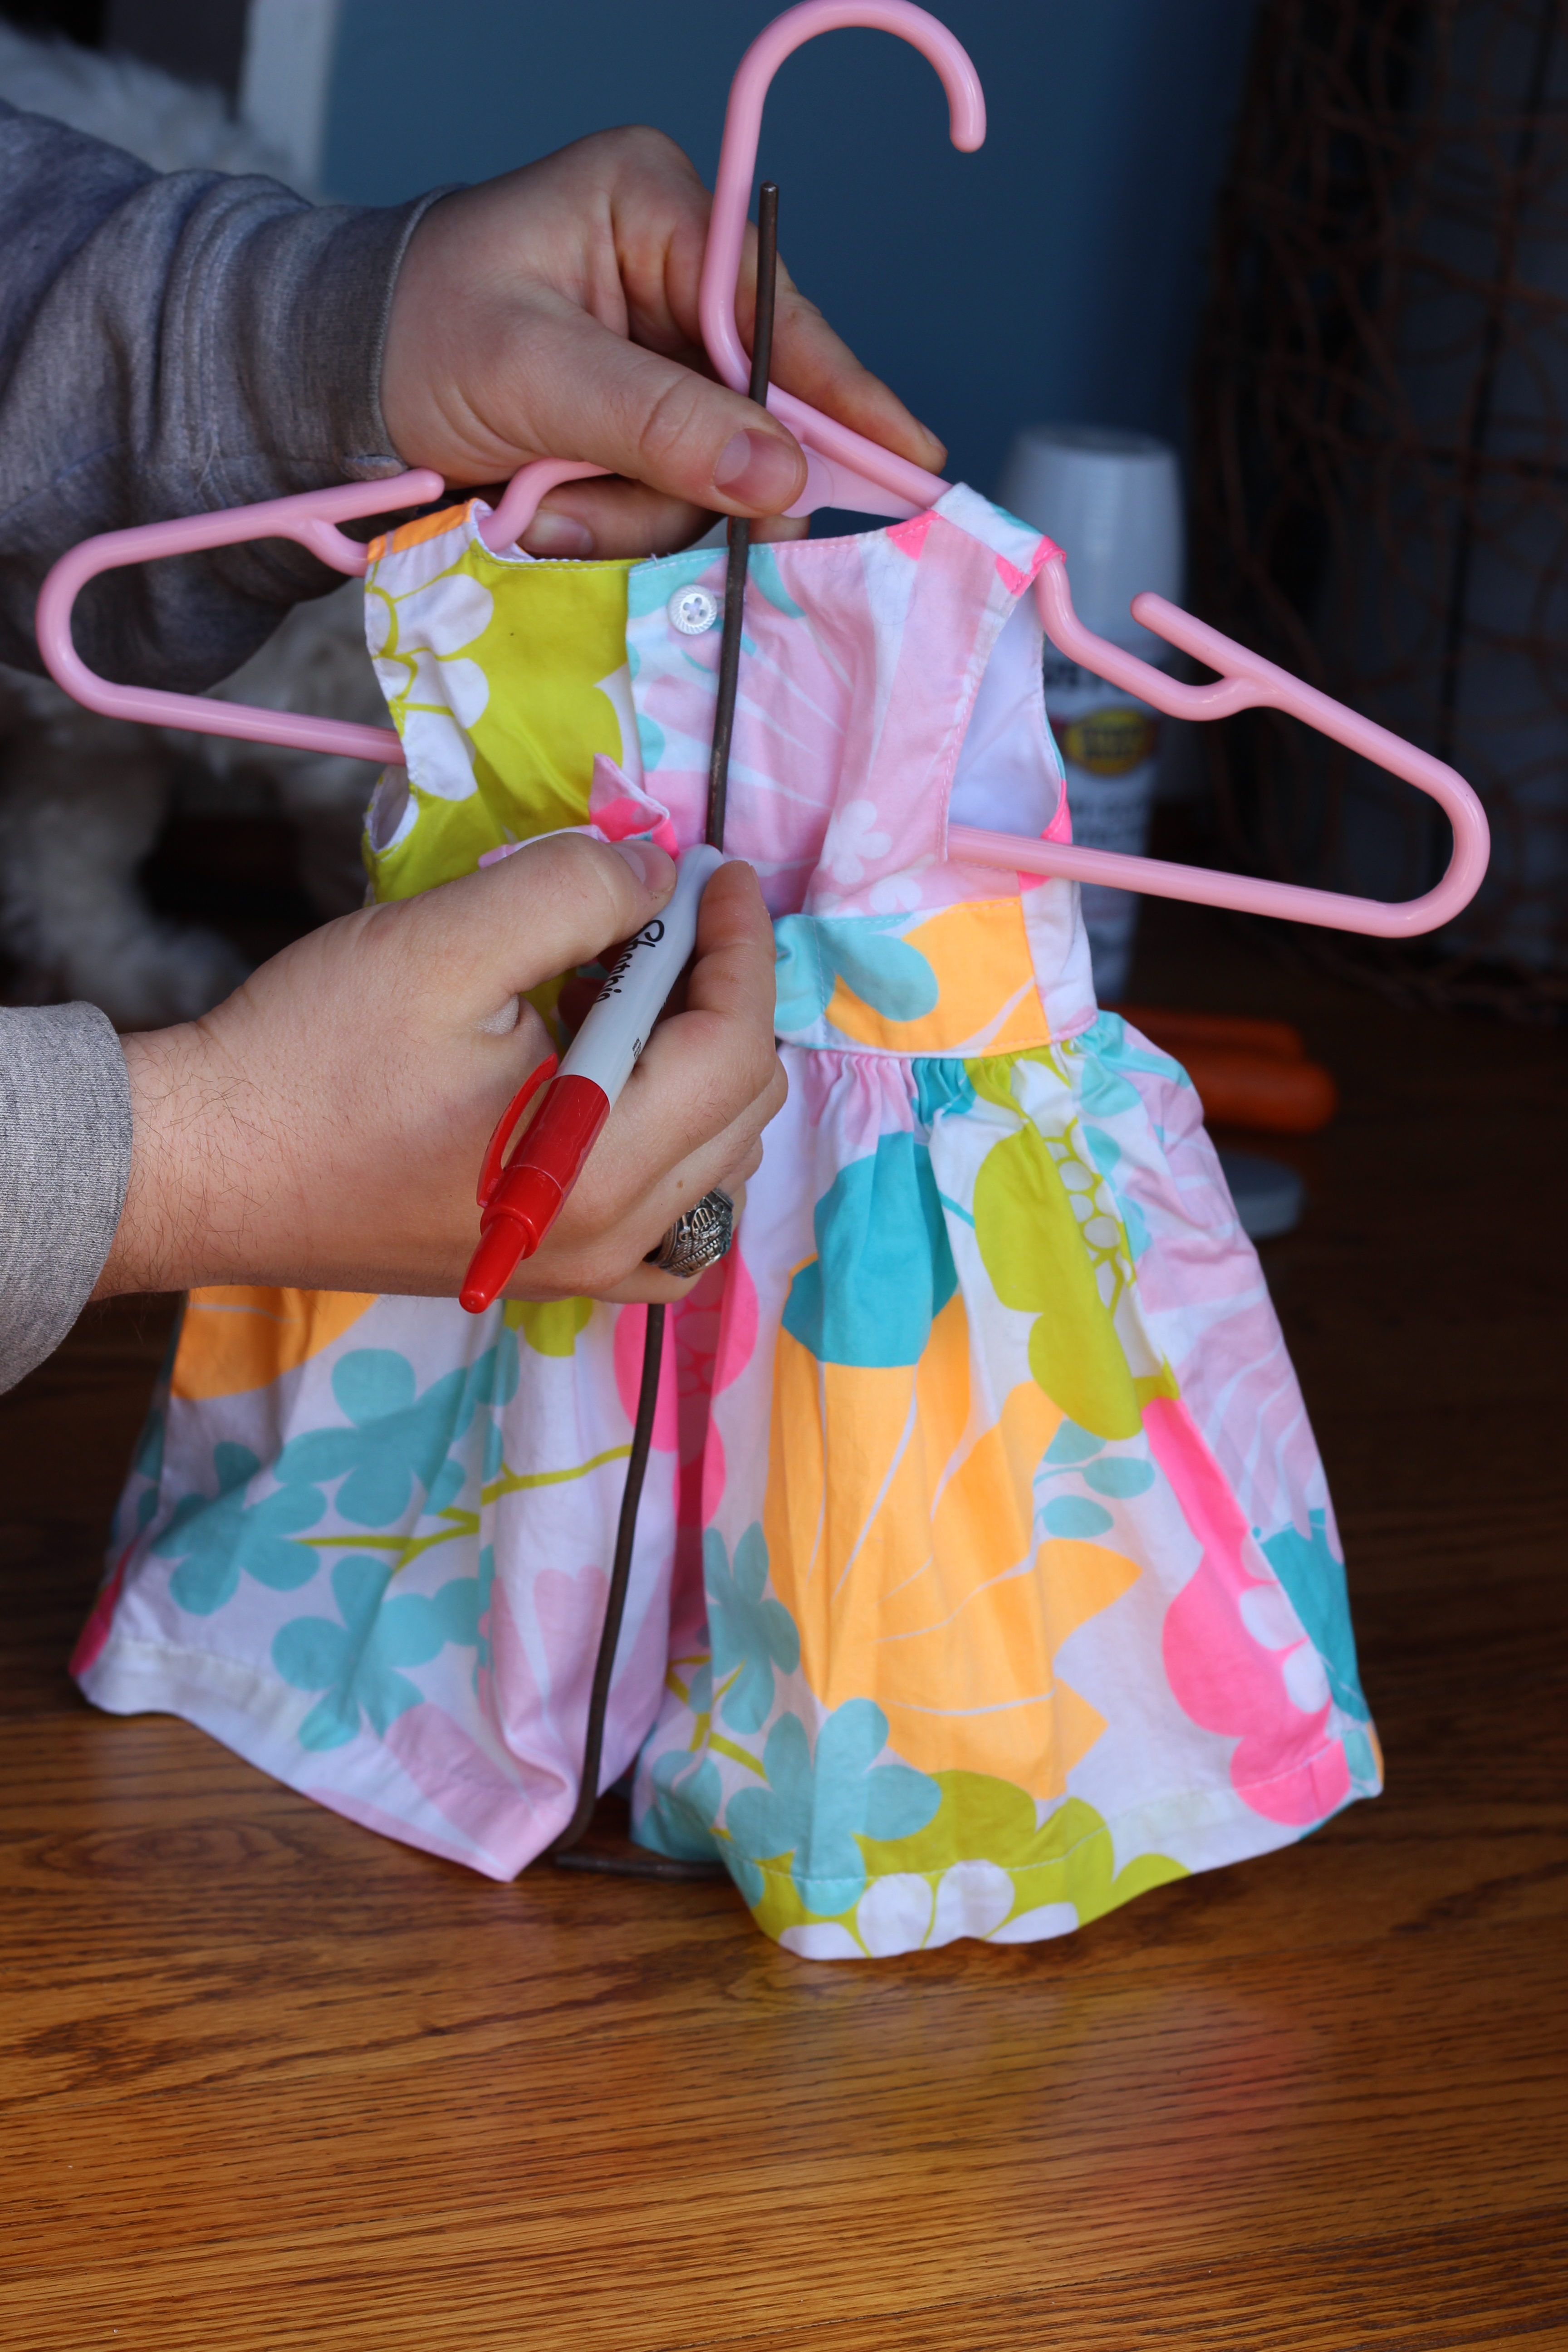
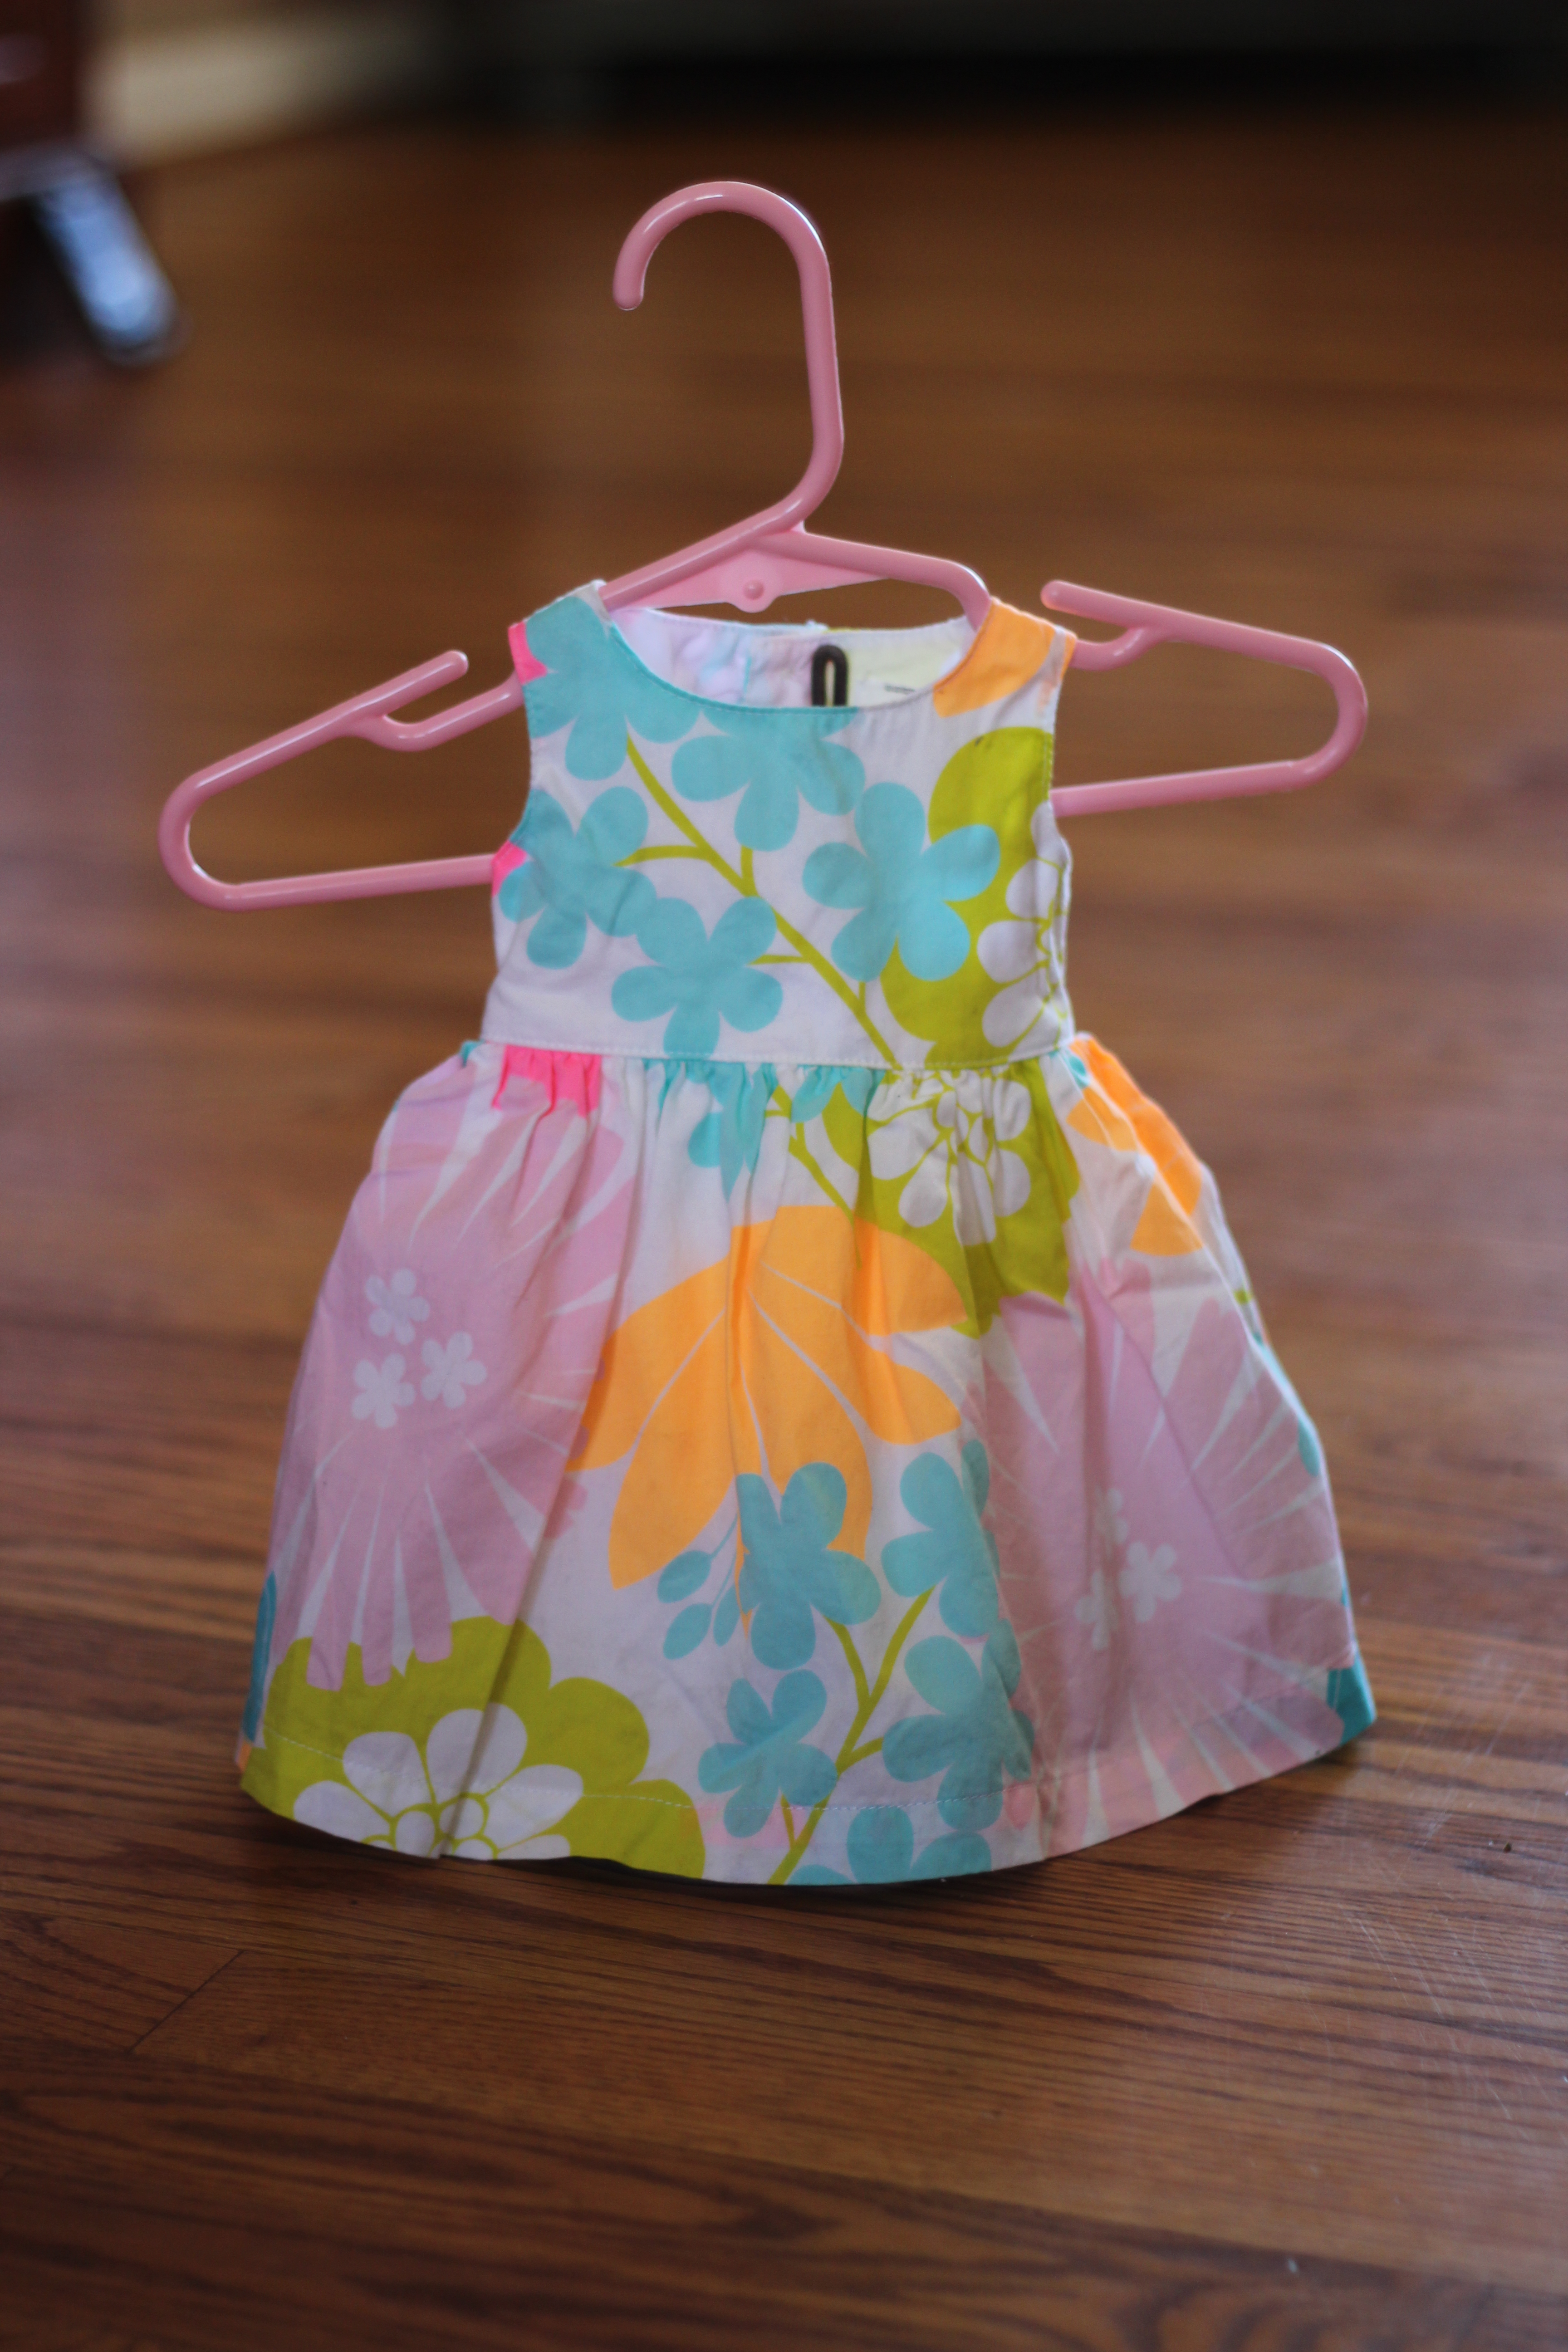
3. With the dress on the hanger, hold it up to the stand at the height where you want the dress to hang. Mark on the wire where the bottom of the hanger should fall.
4. Measure approximately 4 inches above the mark and cut. Discard remaining wire. Using a file, round off the edge you just cut. This is the part that will contact the dress so make sure it is very smooth before continuing.
5. Approximately 1 1/4″ from the mark, bend the wire all the way to the right until it touches itself. Pinch the bend shut.
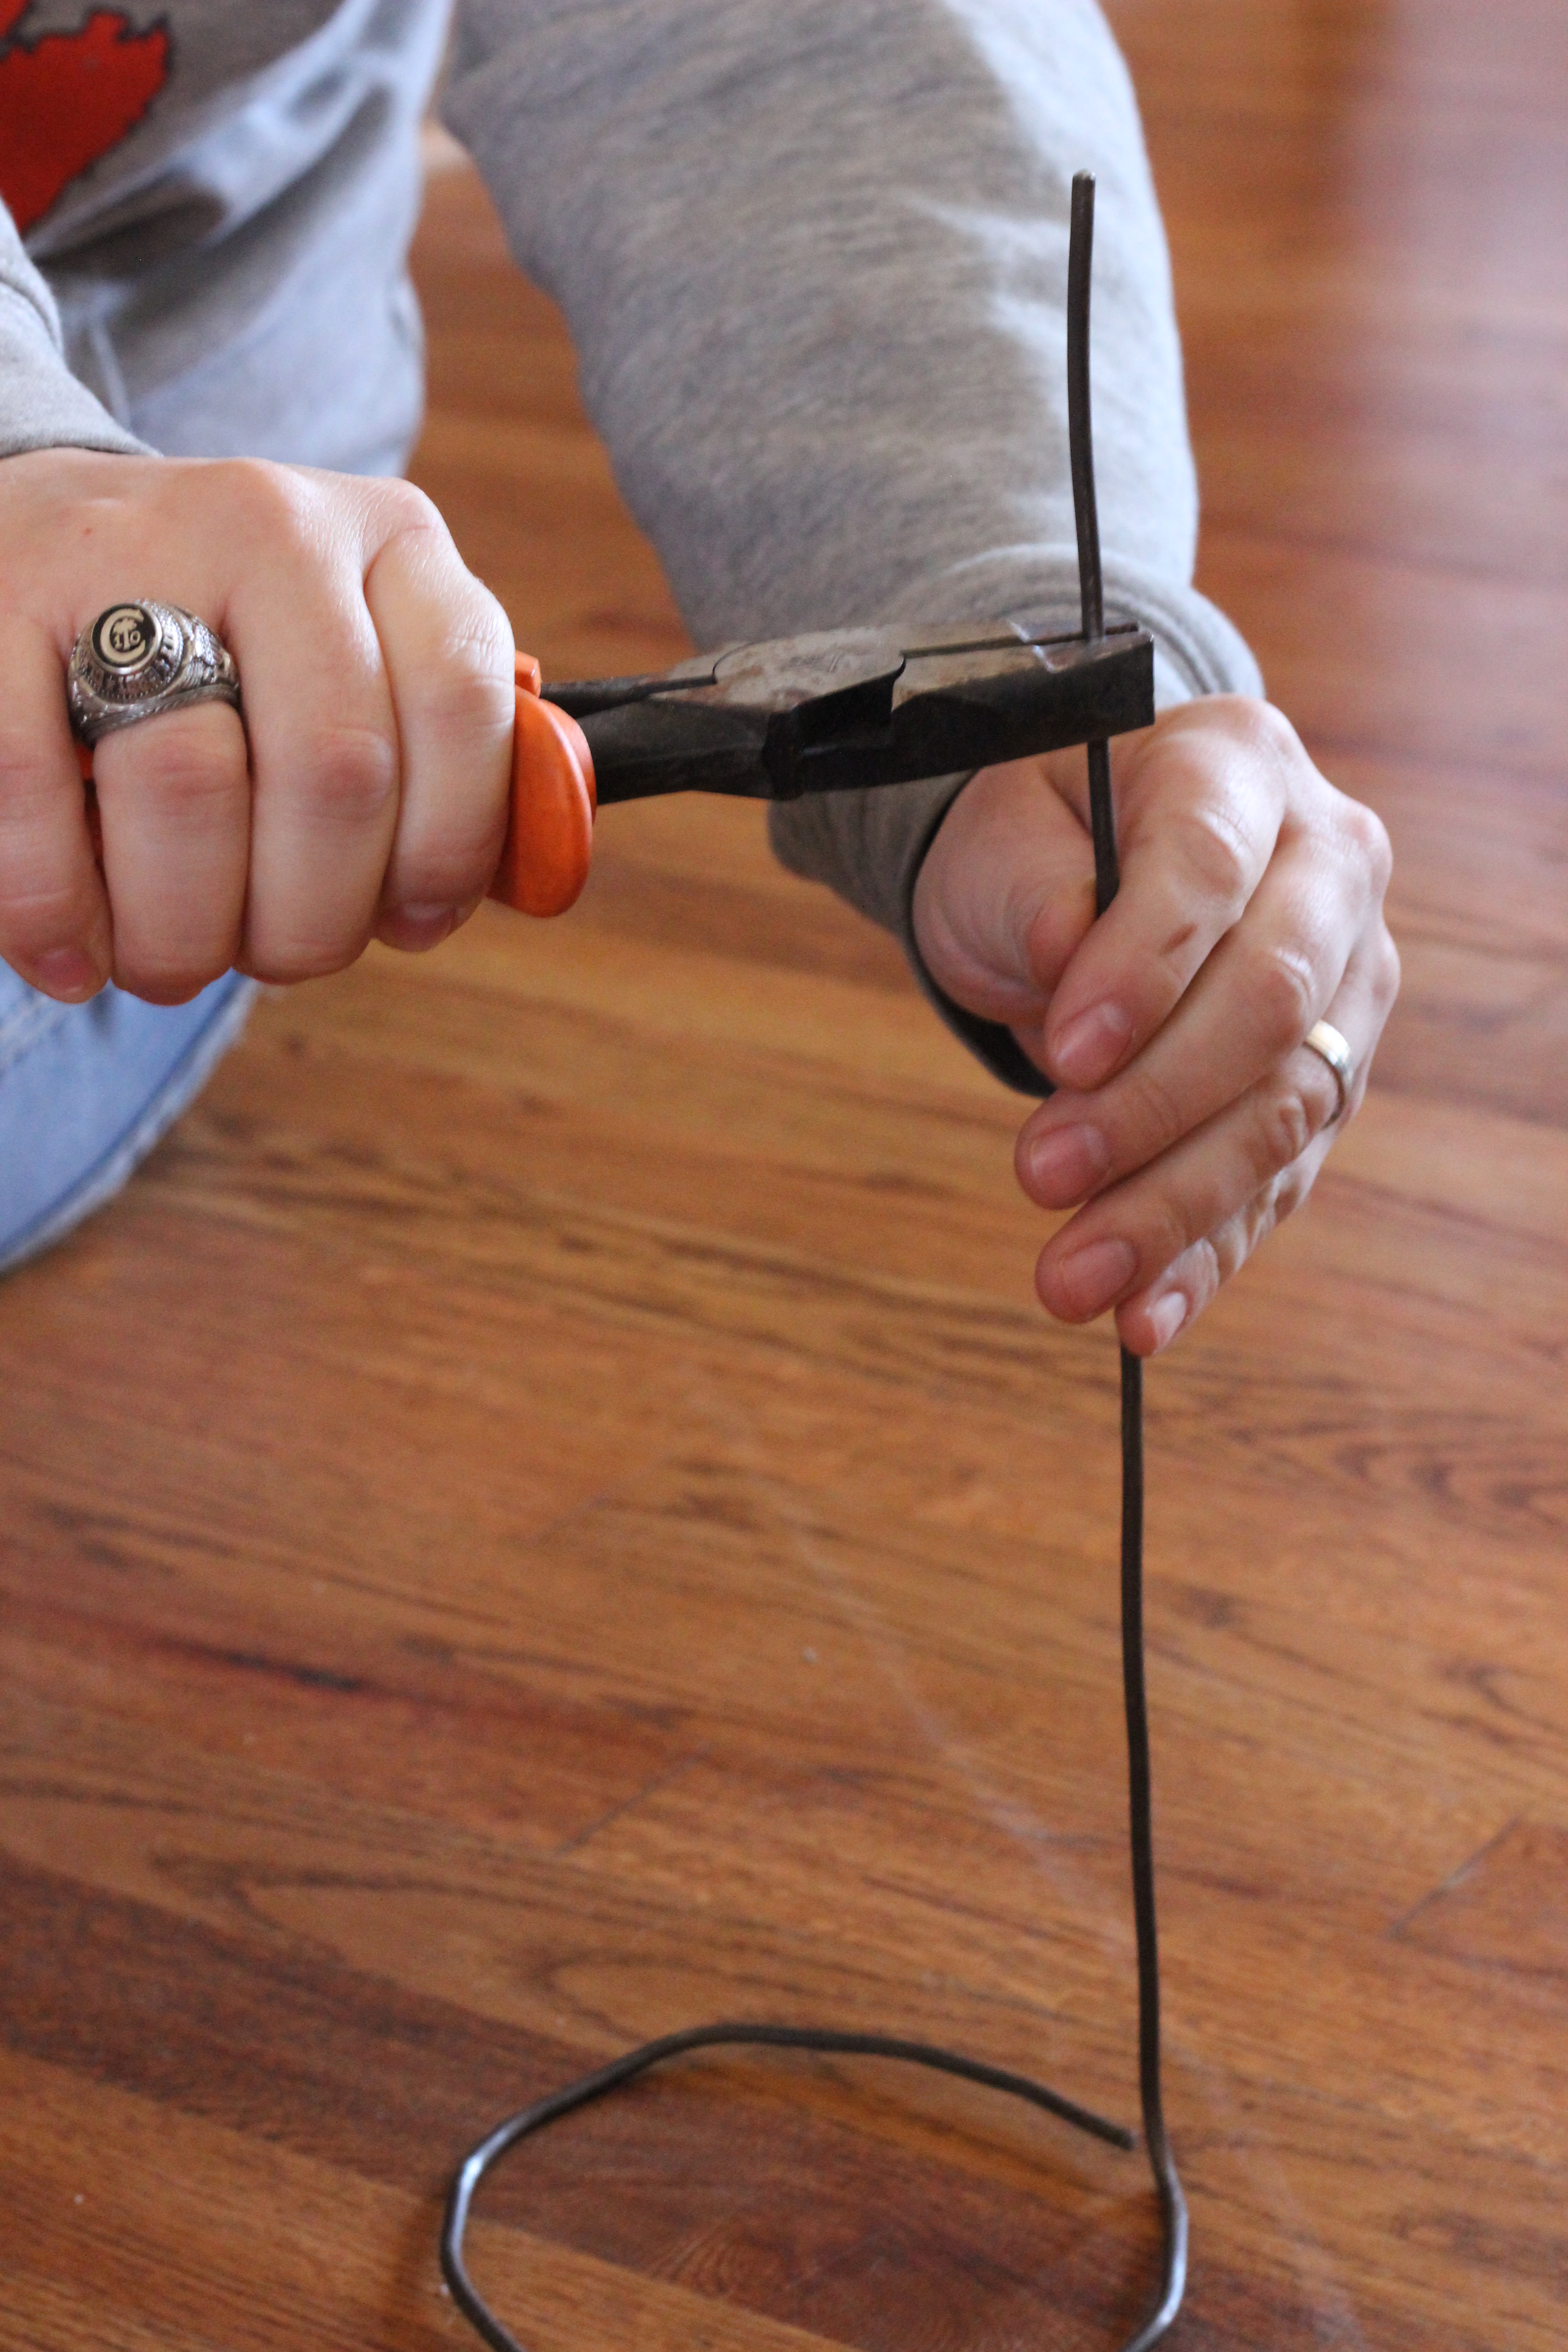
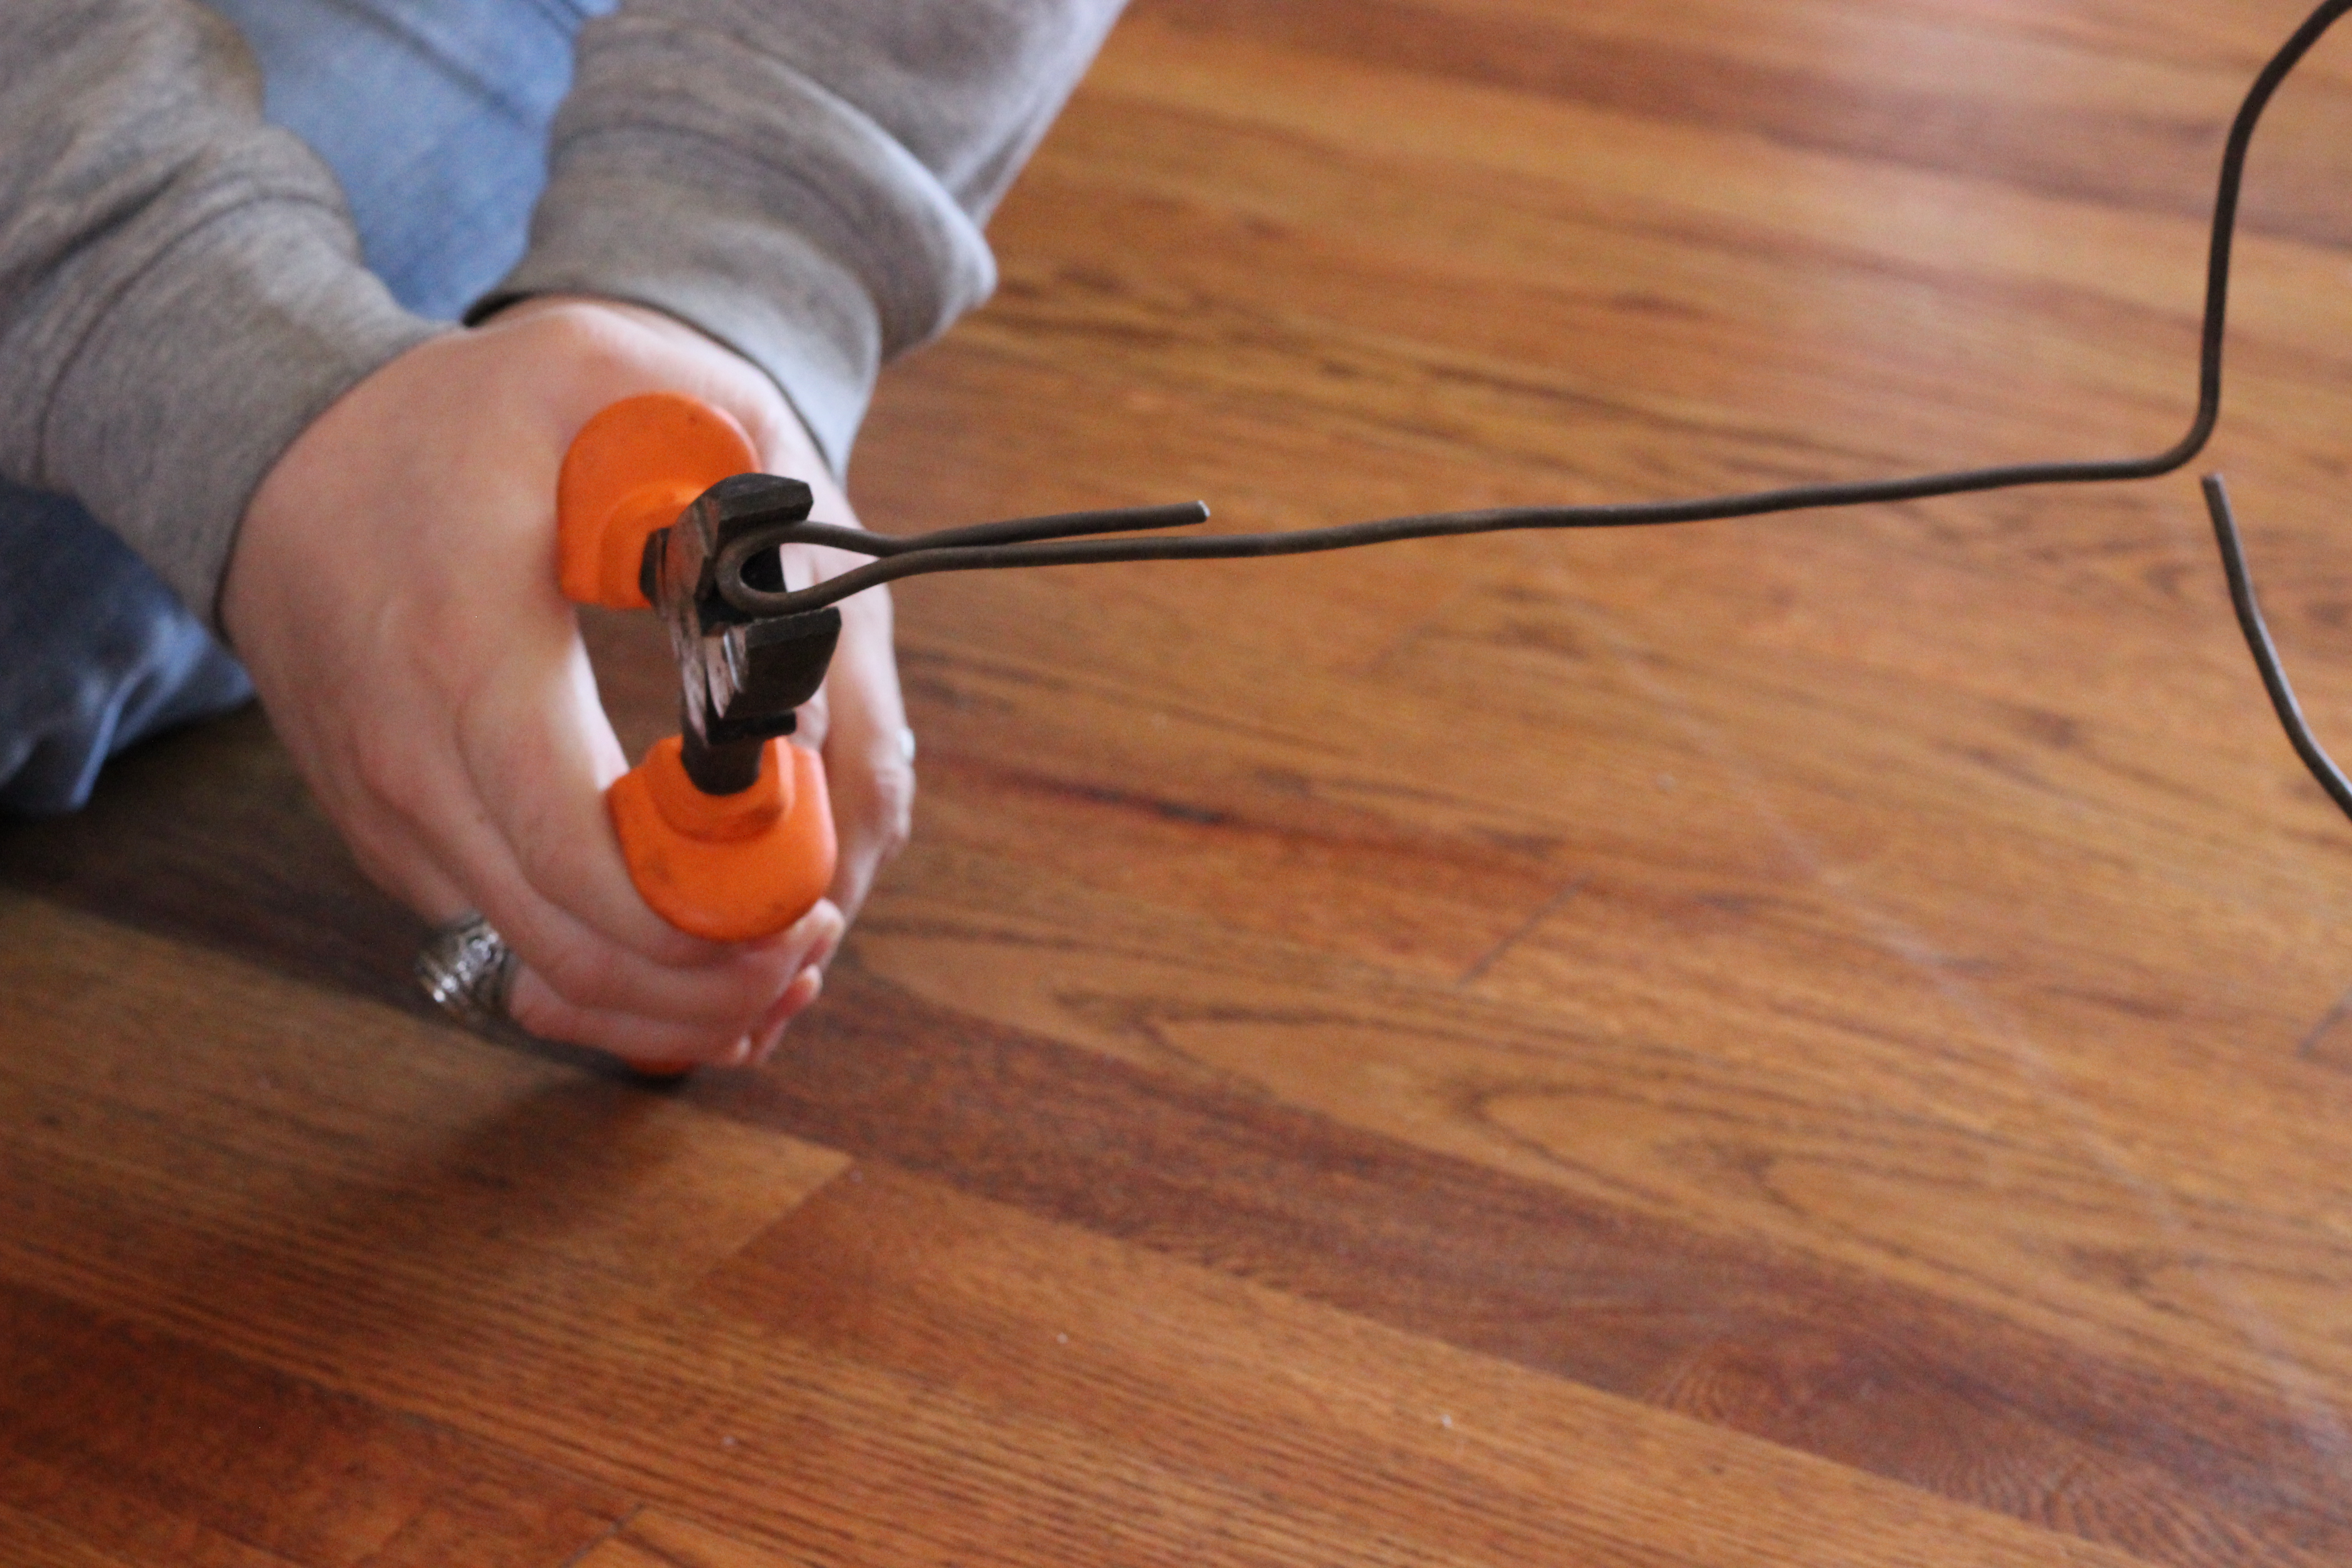
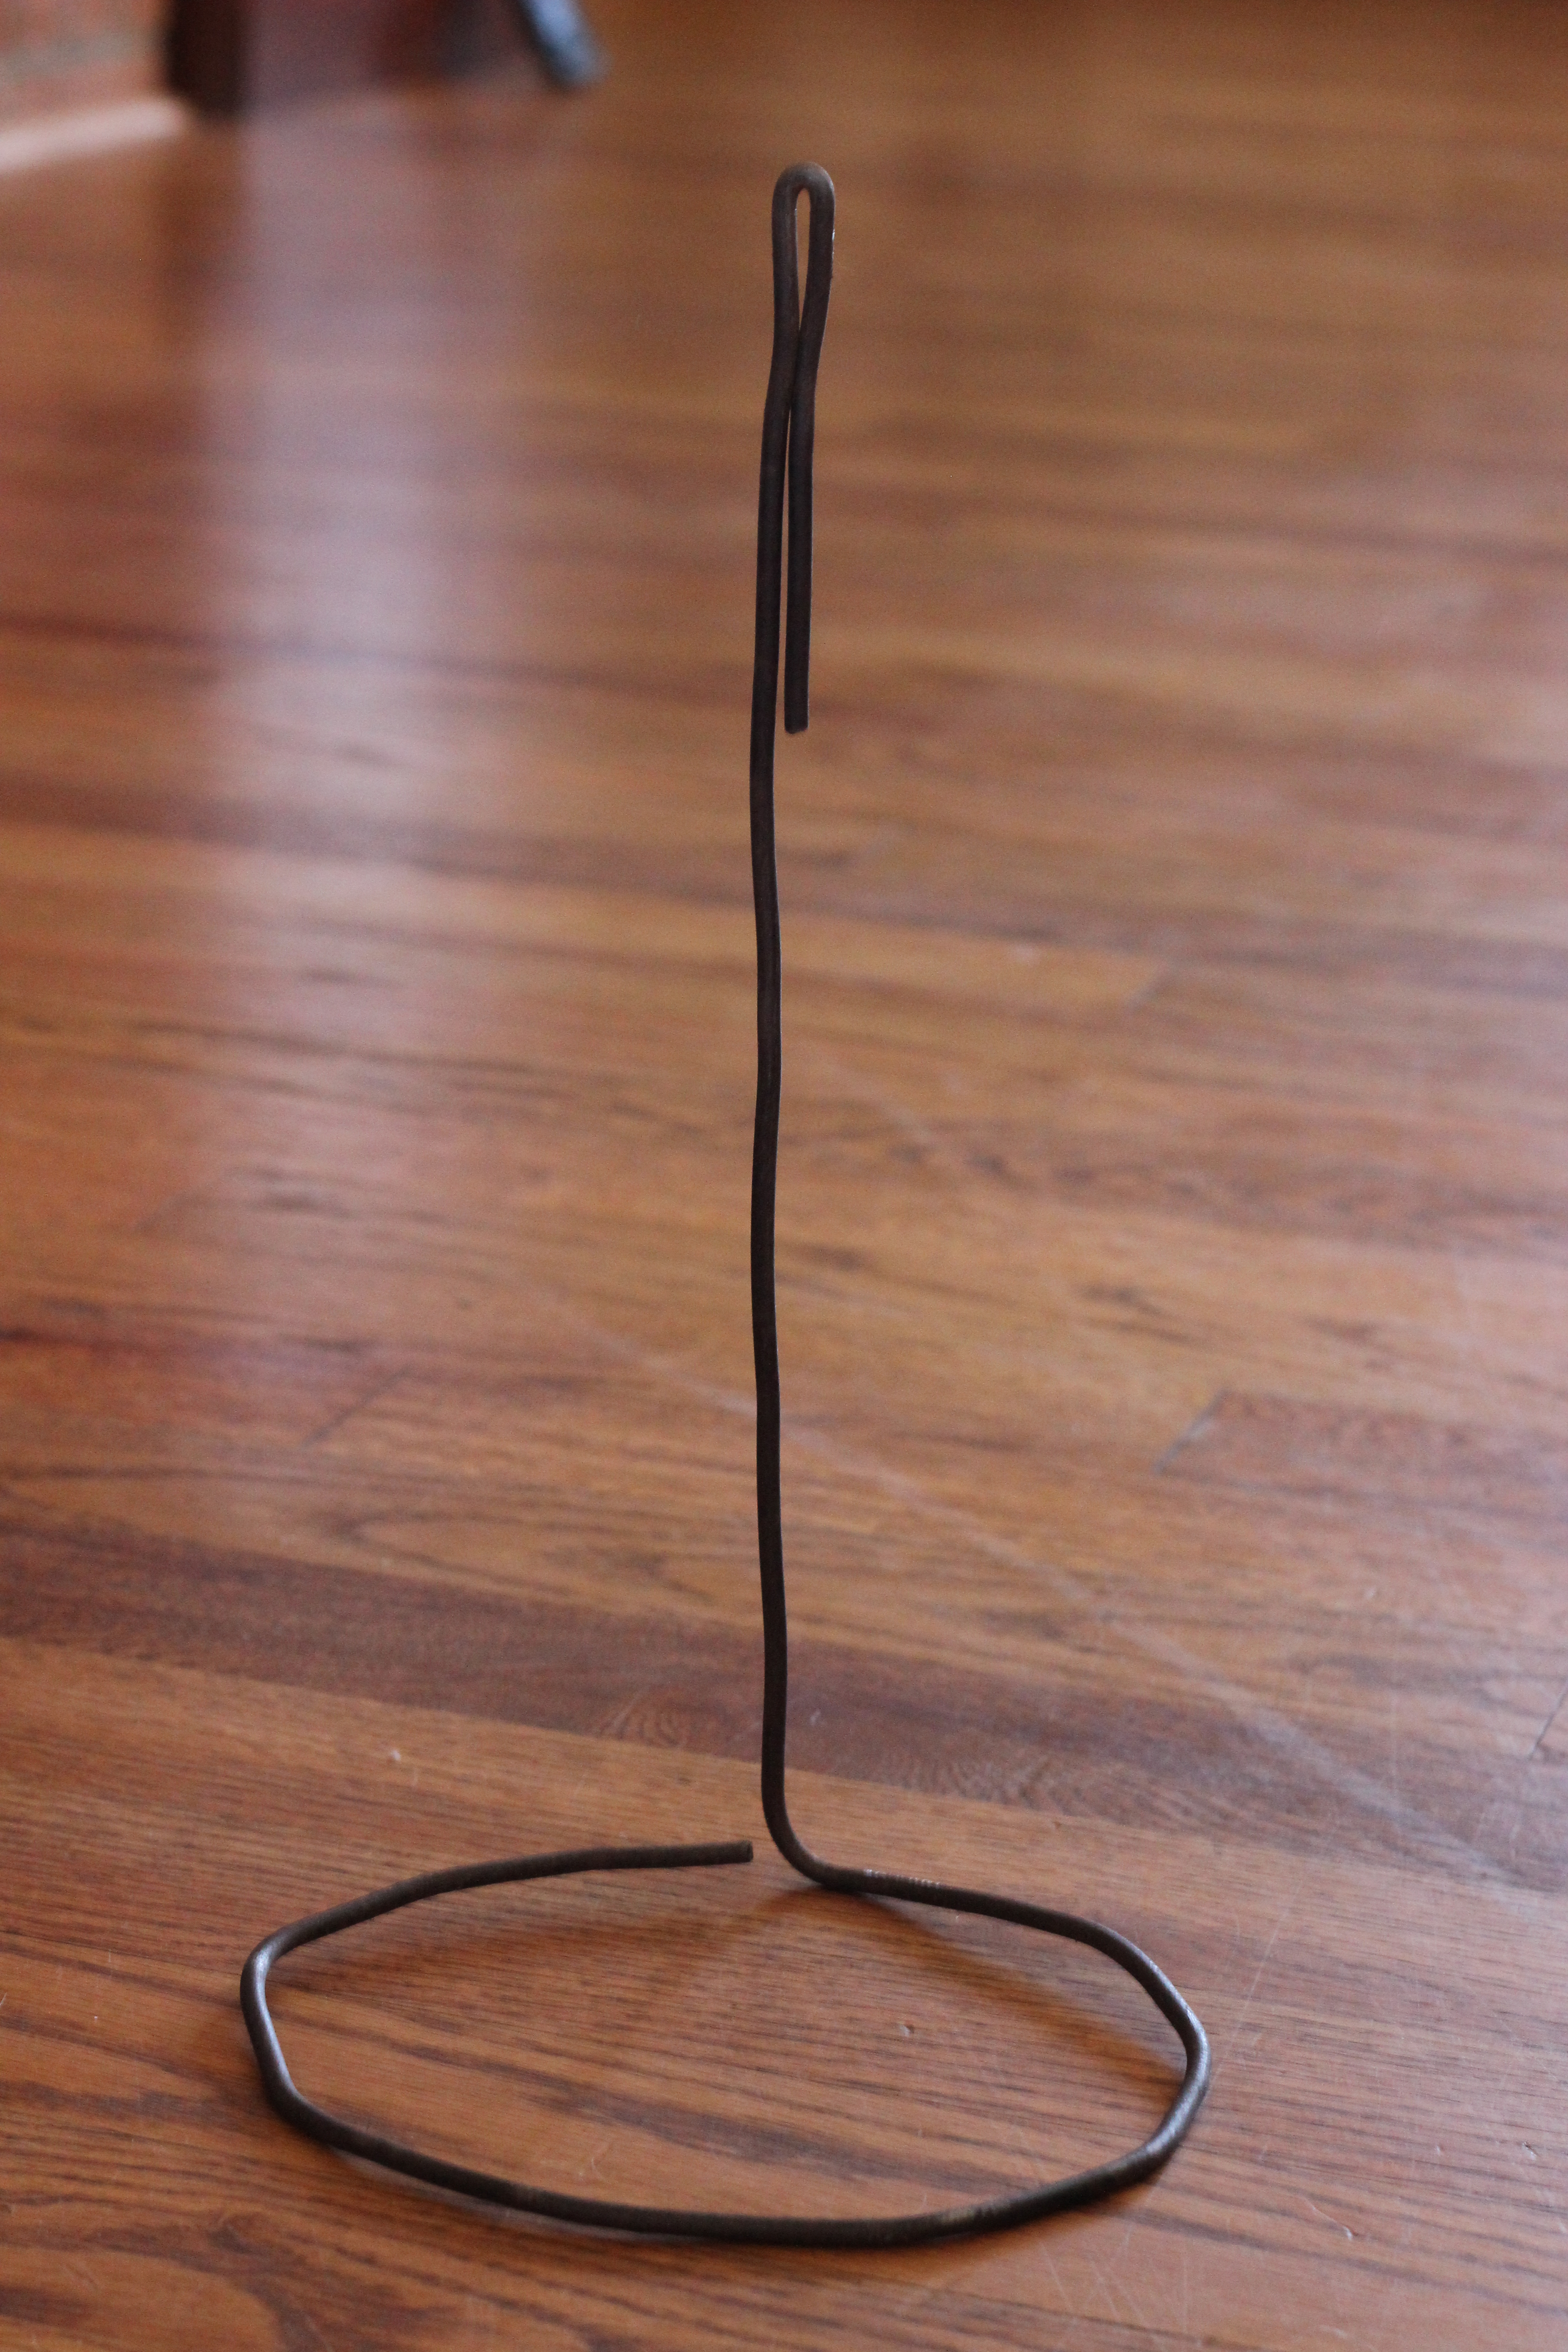
6. Using the pliers, bend the end of the wire away from the front of the stand in a “U” shape so that the bottom of the “U” is at the mark that you placed. This may take some trial and error.


Testing and Painting:
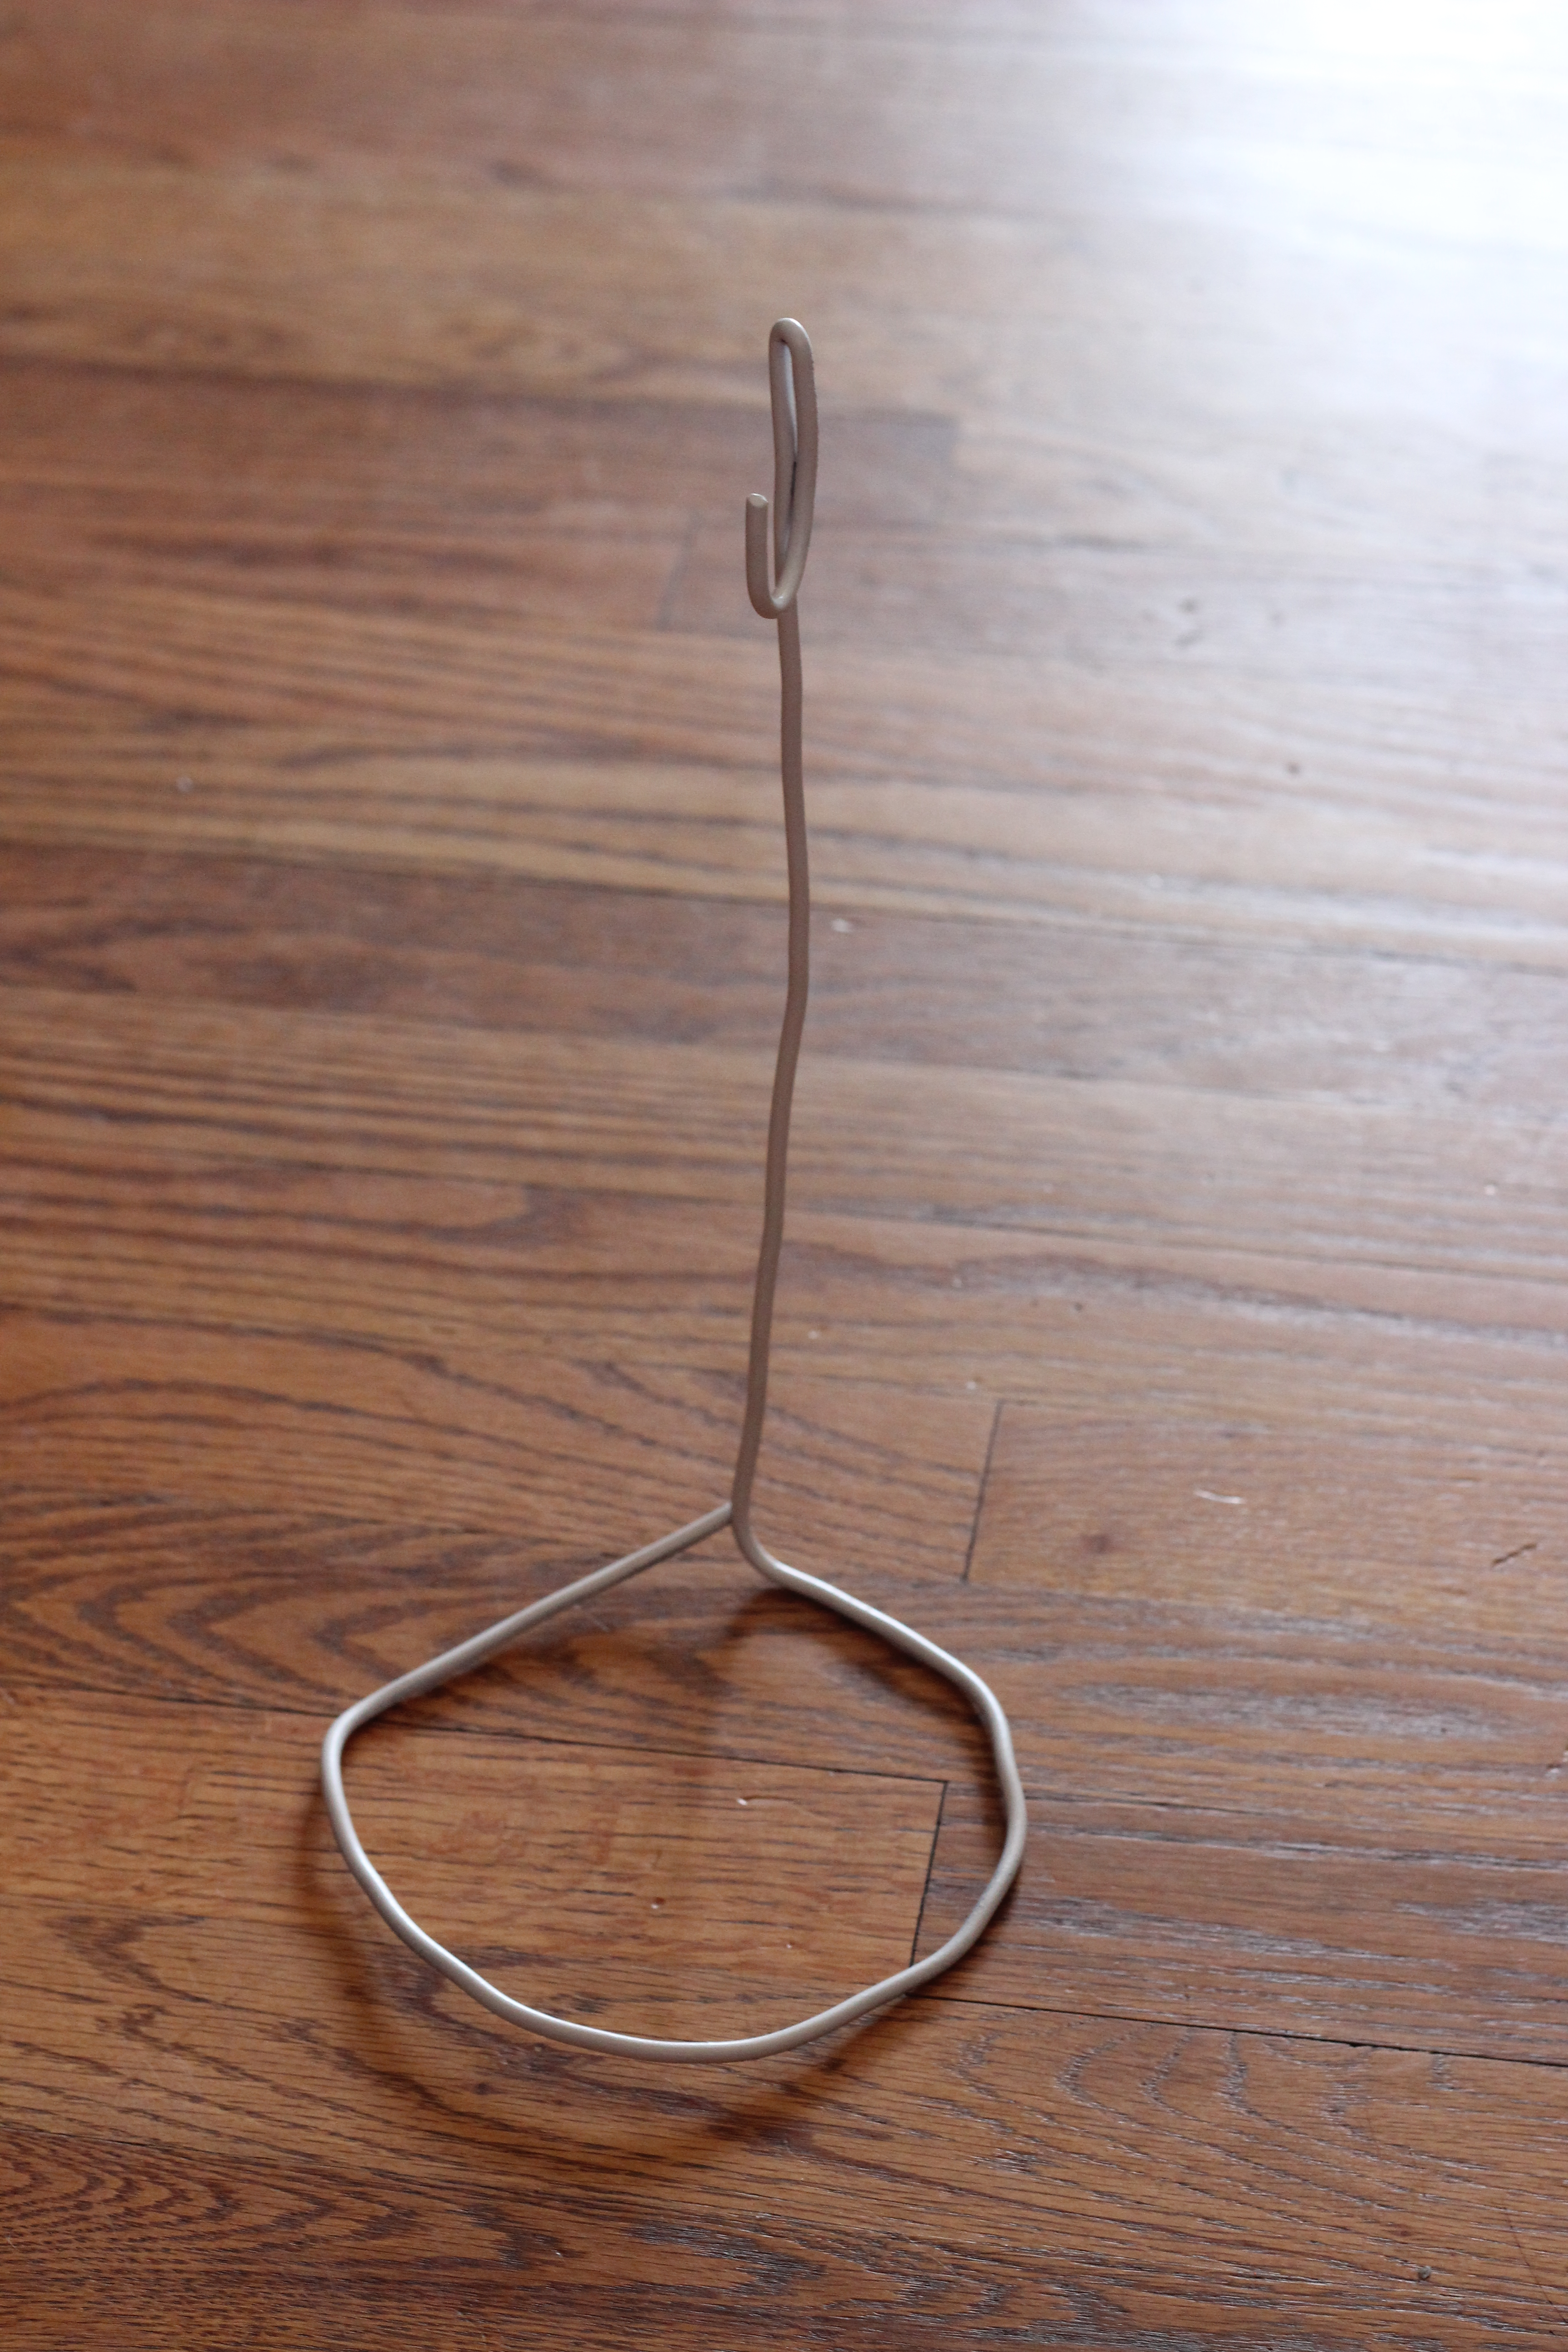
1. Center the bottom of the hanger onto the “U” and make sure that the stand is the appropriate length for the dress.
2. Paint the stand desired color. I painted mine white because I didn’t want to draw any attention away from the dresses themselves.
3. In this tutorial, I used a plastic hanger but at the shower I used satin hangers similar to these. The plastic hangers don’t sit as well in the hook but it was all I had. I suggest using the satin hangers because I think they look prettier but you could use the plastic hanger, if you want.

The whole process is really easy but I wanted to make sure I listed every step in pictures because it gets kind of hard to explain when you’re bending wire. If you have any questions, just let me know and I’ll let Cory answer them!
This post is linked with Kayla from Home Coming.
30 Comments
lauryn
that is so cool!!! what a great idea!! very smart hubby!!
Paige Sloan
Yes, he is! So thankful he came up with it!
whitney
now that is a brilliant idea that i will indeed be copying some day! seriously, so cute and perfect!!
Paige Sloan
Thank you! My hubs is a smart one!
hope davis
SO cute girl :)!
Paige Sloan
Thank you :)
Kayla White @ Mississippi Mrs.
Okay, best idea ever! Love this!
Paige Sloan
The hubs is so smart for coming up with it! I loved the way it turned out :)
Mary
Those dresses are seriously so cute and the stands are a perfect idea! If i ever host a baby shower for someone i might just steal that idea!!
Paige Sloan
Thank goodness my hubs was able to come up with the idea! It was perfect for a baby girl shower.
Colleen
Would a metal coat hanger work for the wire?
Paige Sloan
It may but I can’t answer for sure because I’ve never tried it.
Barbara
I am definetly going to try this for my daughters baby shower.
Paige Sloan
Yay! Hope it turns out beautifully!
Melissande
Thank you so much for this! I’m planning a shower and I had no idea how to hang the dresses. My husband is going to make these. Love the step by step. :)
Paige Sloan
So glad I was able to help!
janis
If you use the satin hangers, what part are you hanging on the wire? The top (hook)?
Paige Sloan
You just set the hanger down onto the hook.
steve
Hi. the example you gave was for a 11″ dress and I was wondering what the approximate wire length would be for a 15″ dress. Does 16 inches to form the base plus 13 inches for the rod plus 4 inches for the “U” shaped hook total length of wire 33 inches sound right? thanks!
Paige Sloan
Offhand that sounds about right, but the best way is to make sure you have plenty of extra wire for trial and error, then form the base and the rod, and then hold the dress up to see how tall you need the stand to be before forming the hook shape. The bottom of the hook where the hanger will rest should fall out tall enough to suspend the dress at the height you need. I hope this helps!
Letty rivera
Can you tell me were u bought the hangers please!:)
Doris Griffin
Thanks so much. i’m going to try this weekend. May God continue to bless you and your beautiful family.
AnGie
Thanks for the idea and oh my did i find a much easier way. You know those Small wreath standS. You get them for like $2 by the cemetary stuff. WEll you can sit the hanger right on the tOp peg and wrap the dress around it. Then just snip the metal legs to the hight you want. super easy and oh so cute. Wish i could post the picture.
Linda Olejnichak
where do you get the stands for $2?…what store?
Gabriella
HELP! I am planning a baby shower for my daughter-in-law and love the dress idea for the center pieces. I am visual, is there any way you can send me pictures of how you put the stand together. Pleassssse.
nana
i love this idea and im going to use it for my sister she is having twins and the theme sugar and spice she is having twin girls
S. Richards
such a cute idea and very useful Great for each table have to try this for the next baby shower I have.
Paige @ Reasons to Come Home
Thank you so much! I’ve done it over and over again and always love the results!
Pingback:
Joan
Thanks so much for this, they’re adorable! I’ve made them for a Shower. The sleeveless dresses work best and (because I’m lazy about filing) I used a small file to take off the worst burrs and covered the ends of the wire with the Dishwasher Tine Caps you use for dishwasher rack repair. You and your husband are a clever team.:)